How to use the Change Icon Dialogue
Intent Architect allows specifying an icon in many different places and this is always done using the Change Icon Dialogue, this how-to will guide you on how to use it.
Opening the Dialogue
There are various different places where the Change Icon Dialogue can be opened from, for example by clicking the icon on the Create Application screen:

Or on a stereotype definition / property:

And some other places too with the same/similar paradigm.
Overview of the dialogue
The dialogue has the following parts:
- A preview of the icon.
- "Tabs" which can be used to specify which type of icon to use.
- Content specific to the icon type chosen:
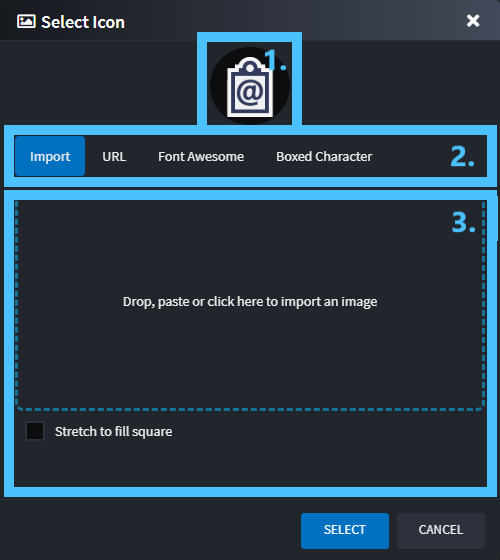
- Icon preview.
- Different icon types.
- Content here changes depending on the icon type (2.) selected.
Different Icon Types
You can use the "Tabs" to choose which type of icon to choose.
Import
This is the easiest way to use any existing image as an icon. You can use Ctrl-V/Cmd+V to paste an image from your clipboard or drag and drop an existing image from a browser window or click on the area to open a browse dialogue.
URL
You can put any valid URL to an image in here. You should only ever use URLs to domains which you personally control or you can alternatively use a Data URL.

Font Awesome
Intent Architect uses Font Awesome and enables use of any these icons:

Boxed Character
This makes basic dynamic icons which are a letter with background color of your choice:
