Intent.Blazor.HttpClients
This Intent Architect module generates HttpClients for Blazor applications.
Getting started
In the Visual Studio IDE, if you haven't already done so, add a
Blazor WebAssembly Appto the same Visual Studio solution which is generated by Intent Architect: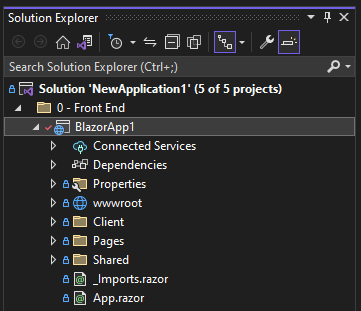
In Intent Architect, open
Visual Studiodesigner.Create a new
.NET Projectwith a name and folder structure which matches that of the Blazor project in the Visual Studio IDE: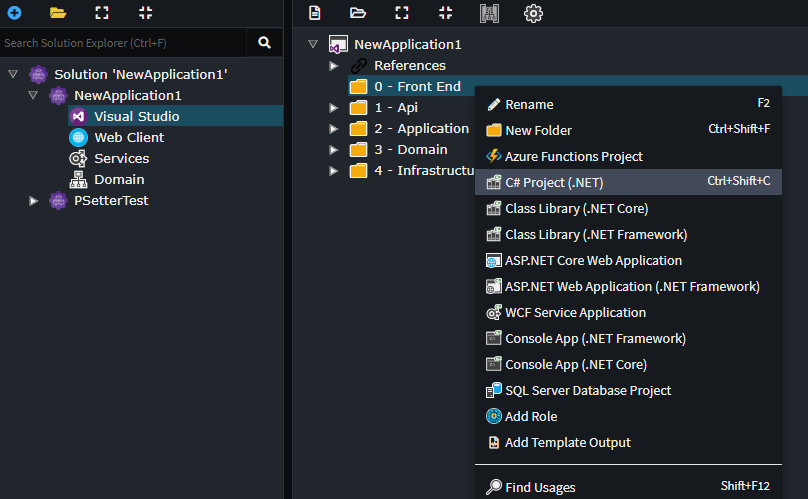
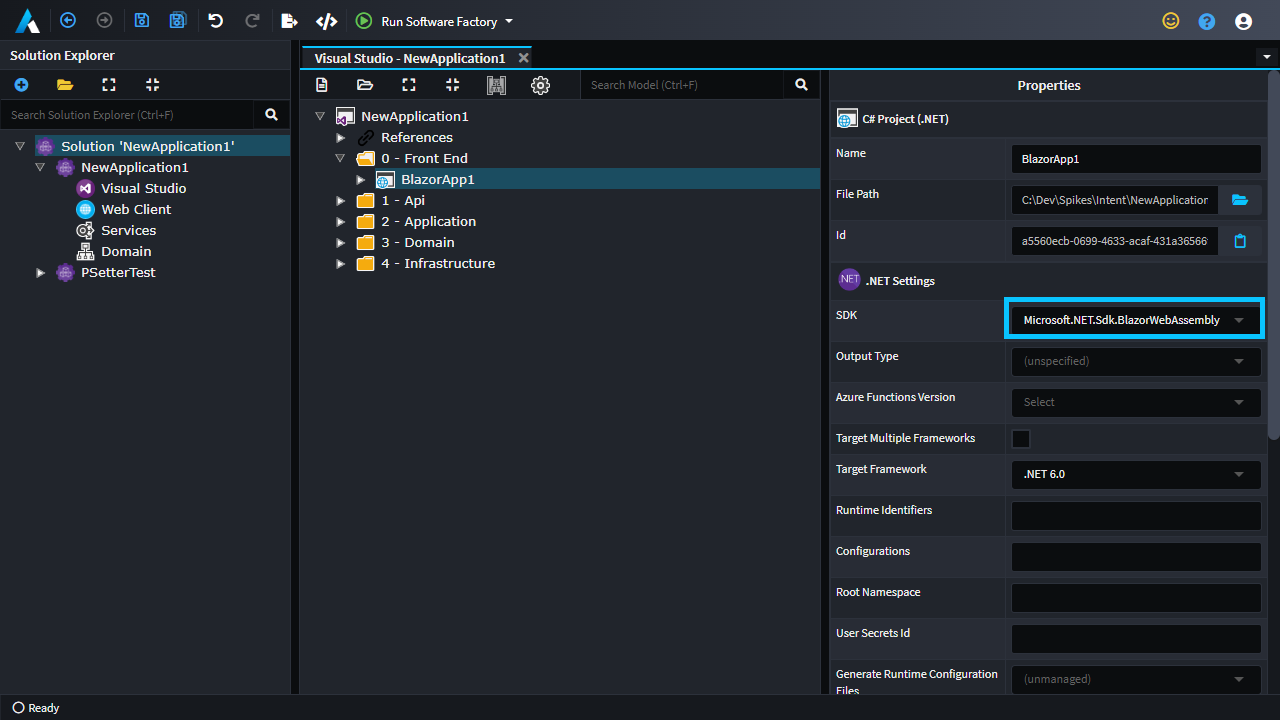
Set the SDK for the project:
- For a
Blazor WebAssembly Appset it toMicrosoft.NET.Sdk.BlazorWebAssembly(if you don't see such an option, ensure you have at least3.3.28of theIntent.VisualStudio.Projectsmodule installed). - For a
Blazor Server Appset it toMicrosoft.NET.Sdk.Web.
- For a
Within the desired location within the project you wish for the
HttpClients and contracts to be generated, create aBlazor.HttpClientrole:
Install the
Intent.Blazor.HttpClientsmodule.
Modelling service proxies
- Ensure you already have one or more HTTP endpoints already modelled in the
Servicesdesigner. In the following example CRUD operations have been created for anInvoiceclass: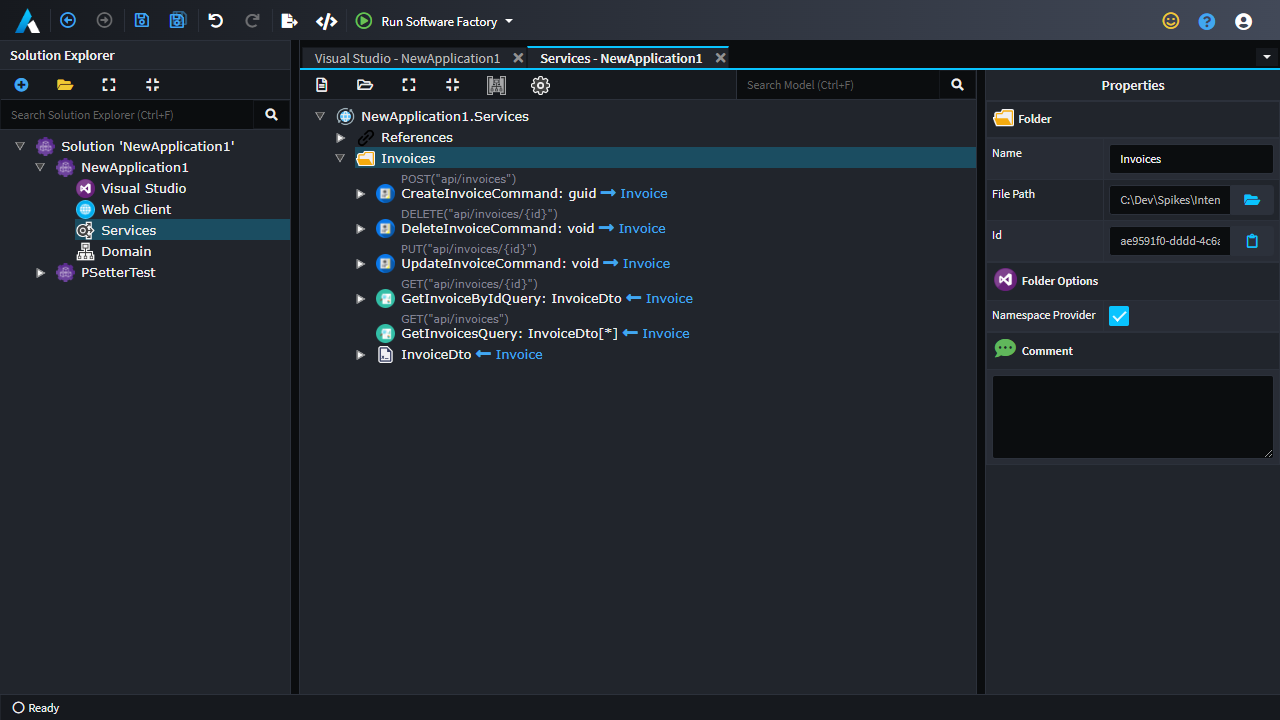
- Open the
Web Clientdesigner and select theNew Service Proxycontext menu option, upon selecting which the mapping dialogue will show. - Select the available application and then select the endpoints to be included in the Service Proxy:
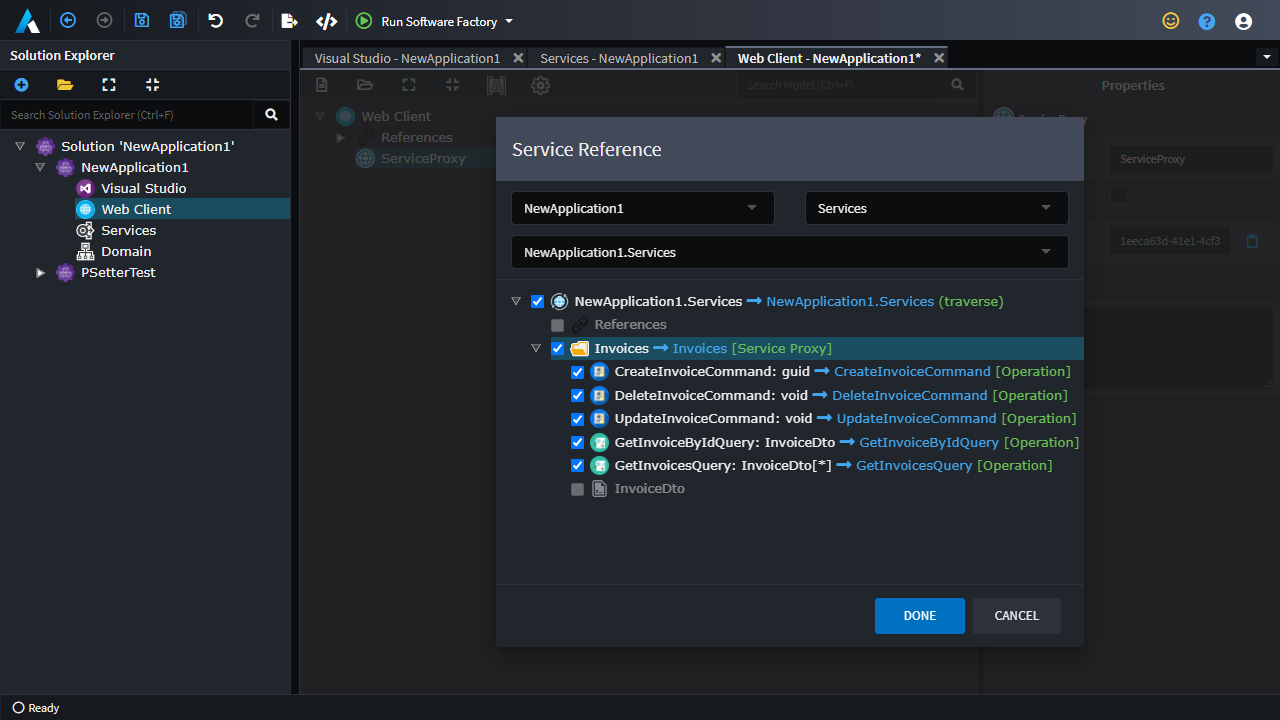
When you run the Software Factory, it will now generate the service proxies as well as supporting contracts and related types.
Registering the HttpClients with the Blazor app's dependency injection
In the Blazor project's Client/Program.cs file, add the following line just before the await builder.Build().RunAsync() line:
builder.Configuration.Add(new MemoryConfigurationSource
{
    InitialData = new Dictionary<string, string>
    {
        ["Urls:<applicationName>"] = "https://localhost:44321/"
    }
});
builder.Services.AddHttpClients(builder.Configuration);
<applicationName> above will need to be replaced with application name as generated by Intent into the HttpClientConfiguration.cs file.
The value for "Urls:<applicationName>" is automatically set from the Api project (if a URL is configured).
The URL is determined using the following settings, in order of priority:
Service URL
Defined in theEndpoint Settingsstereotype on the Api Service package in the Services Designer.- Automatically populated when importing an OpenAPI document from an external service.
- Can also be set manually for a modeled service.
Base URL
Defined in theLaunch Settingsstereotype on the Api startup project in the Visual Studio Designer.- Automatically populated if the required version of
Intent.VisualStudio.Projectsis installed.
- Automatically populated if the required version of
Default value
If no value is found in the above settings, a default ofhttps://localhost:44321/will be used.- This should be updated to the correct URL for your Api project.
- In development, you can find the URL in the Api project’s
Properties/launchSettings.jsonfile.
Note
The above example is using a Memory Configuration Source to add the configuration, but any configuration source providing the appropriate key will work.
The Program.cs file should now look something like this:
using BlazorApp1;
using BlazorApp1.HttpClients;
using Microsoft.AspNetCore.Components.Web;
using Microsoft.AspNetCore.Components.WebAssembly.Hosting;
using Microsoft.Extensions.Configuration.Memory;
using Microsoft.Extensions.DependencyInjection;

namespace BlazorApp1
{
    public class Program
    {
        public static async Task Main(string[] args)
        {
            var builder = WebAssemblyHostBuilder.CreateDefault(args);
            builder.RootComponents.Add<App>("#app");
            builder.RootComponents.Add<HeadOutlet>("head::after");

            builder.Services.AddScoped(sp => new HttpClient { BaseAddress = new Uri(builder.HostEnvironment.BaseAddress) });
            builder.Configuration.Add(new MemoryConfigurationSource
            {
                InitialData = new Dictionary<string, string>
                {
                    ["Urls:Invoices"] = "https://localhost:44341/"
                }
            });
            builder.Services.AddHttpClients(builder.Configuration);

            await builder.Build().RunAsync();
        }
    }
}
Attaching JWTs to outgoing requests
The generated HttpClients will automatically include Bearer JWT headers in outgoing requests to secured endpoints, but they require security to already be configured for the Blazor application.
Depending on your authentication and authorization strategy, you may be able to use one of the available options as documented by Microsoft and the generated HttpClients should just work with no additional configuration.
If you have a custom authentication/authorization strategy, you may commonly encounter either or both of the following errors:
No service for type 'Microsoft.AspNetCore.Components.WebAssembly.Authentication.AuthorizationMessageHandler' has been registered.
To resolve this, add the following line to your Program.cs file:
builder.Services.AddTransient<AuthorizationMessageHandler>();
Unable to resolve service for type 'Microsoft.AspNetCore.Components.WebAssembly.Authentication.IAccessTokenProvider' while attempting to activate 'Microsoft.AspNetCore.Components.WebAssembly.Authentication.AuthorizationMessageHandler'.
You will need to create an implementation of IAccessTokenProvider and register it as a service.
A simple implementation could be as follows:
internal class AccessTokenProvider : IAccessTokenProvider
{
    public ValueTask<AccessTokenResult> RequestAccessToken()
    {
        var accessToken = new AccessToken
        {
            Expires = DateTimeOffset.MaxValue,
            Value = "<your access token here>"
        };

        var result = new AccessTokenResult(AccessTokenResultStatus.Success, accessToken, null);

        return ValueTask.FromResult(result);
    }

    public async ValueTask<AccessTokenResult> RequestAccessToken(AccessTokenRequestOptions options)
    {
        return await RequestAccessToken();
    }
}
You would customize the implementation to populate AccessToken's Value with an actual JWT.
You can register your implementation in Program.cs with the following (or similar) code:
builder.Services.AddScoped<IAccessTokenProvider, AccessTokenProvider>();
You can also review Microsoft's documentation on covering additional Blazor security scenarios for more information.
Adding CORS to your Api project
If your Blazor App is hosted on a different BaseUrl to that of your API, the browser will block these cross-origin requests unless you configure CORS in the API project.
You can install the Intent.Modules.AspNetCore.Cors module in the same Intent Architect Application as your API, run the Software Factory and it will then apply the required updates to enable CORS.
Using the service proxy in a Razor file
From within a .razor file it is now possible to inject HttpClients and call methods from them, the following is a simple example:
@page "/fetchdata"
@using BlazorApp1.HttpClients
@using BlazorApp1.HttpClients.InvoicesService
@inject IInvoicesService Http

<PageTitle>Invoices</PageTitle>

<h1>Invoices</h1>

<p>This component demonstrates fetching data from the server.</p>

@if (_invoices == null)
{
    <p><em>Loading...</em></p>
}
else
{
    <table class="table">
        <thead>
            <tr>
                <th>Id</th>
                <th>Number</th>
            </tr>
        </thead>
        <tbody>
            @foreach (var invoice in _invoices)
            {
                <tr>
                    <td>@invoice.Id</td>
                    <td>@invoice.Number</td>
                </tr>
            }
        </tbody>
    </table>
}

@code {
    private List<InvoiceDto>? _invoices;

    protected override async Task OnInitializedAsync()
    {
        _invoices = await Http.GetInvoicesAsync();
    }
}
If you now run both projects, the page with the HttpClient should now be able to fetch and render the data.