Angular UI Modeling with AI
This article explains how to use Intent Architect to rapidly build professional Angular UIs, leveraging both deterministic (pattern-based) and non-deterministic (AI/LLM-driven) code generation.
The high-level workflow is:
Design and generate your View Models: Define which services to interact with and how UI navigation should work.
Implement with AI: Use the "Implement with AI" accelerator to have your chosen LLM generate the View. Intent Architect manages the context and LLM interactions for you. Review the proposed changes as a code diff, similar to a regular Software Factory execution.
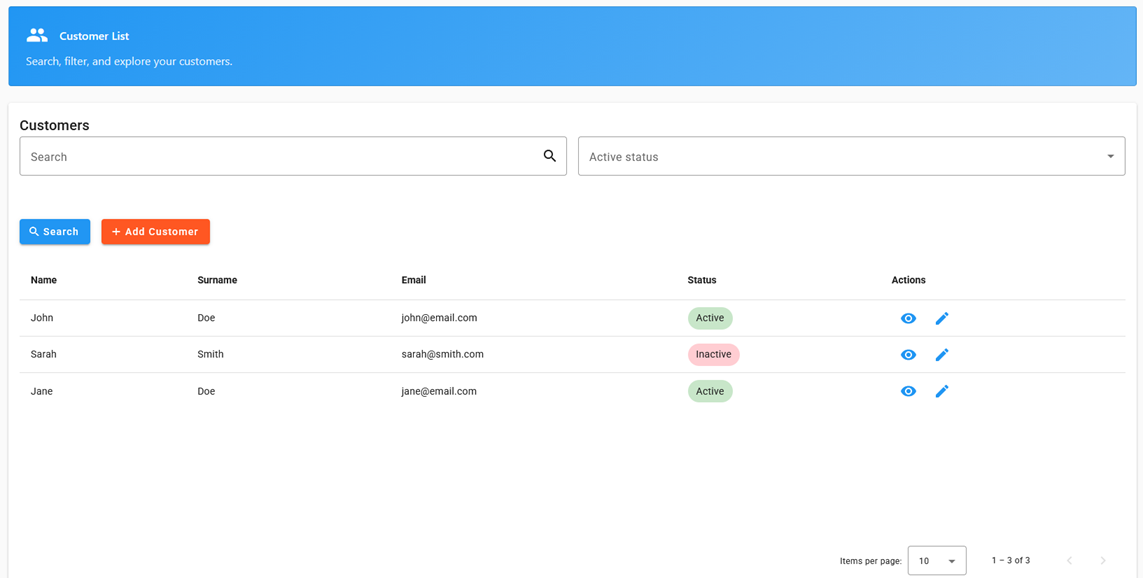
Review and validate the code: Since LLMs are non-deterministic, always review the generated code. With a bit of luck, you’ll get a screen like this:
Note
While the samples use Material Components, the approach is not Material-specific. You can configure for other component libraries as needed.
Note
The Angular modules and application template are currently in beta. If you encounter issues, please let us know. See Known Issues and Snags for current limitations.
Design and Generate Your View Model
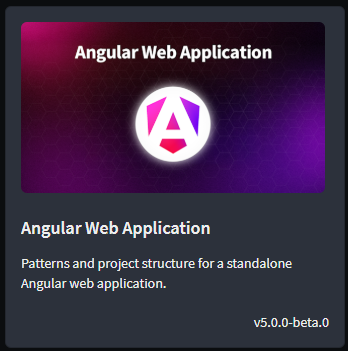
To get started, create an Angular Web Application in Intent Architect (using the Angular Web Application architecture template)
Note
The Angular modules and architecture template are currently in beta. Make sure Include prerelease is checked to see the templates and modules.
Note
A comprehensive Angular Sample application is also available. To use it, select Explore Samples on the left, then choose Angular Web Application.
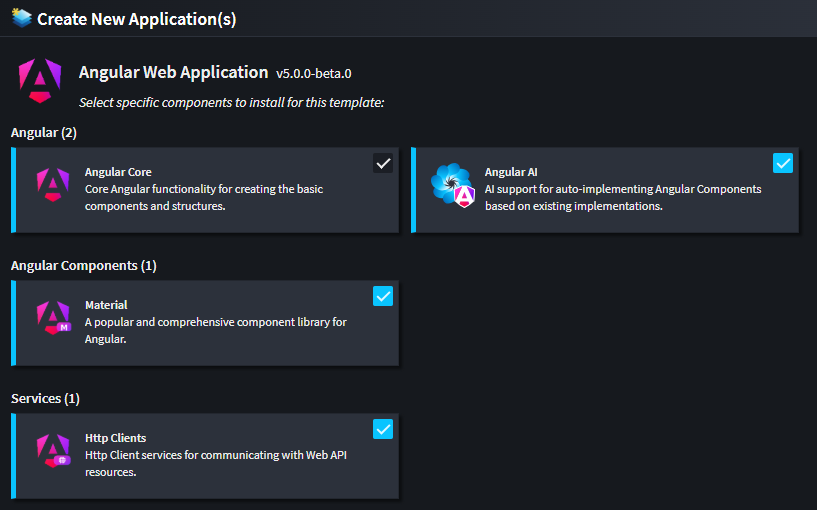
When creating the application, ensure the Angular AI, Material, and Http Clients components are all selected (these are ticked by default):
Initial Code Generation and Module Installation
Run the Software Factory to generate the initial application structure and infrastructure code.
Before running the application, install the referenced modules. Open a console window at your application's output location (a shortcut is provided at the bottom of the Software Factory execution window).
Install the modules:
npm i
Then start the application:
ng serve
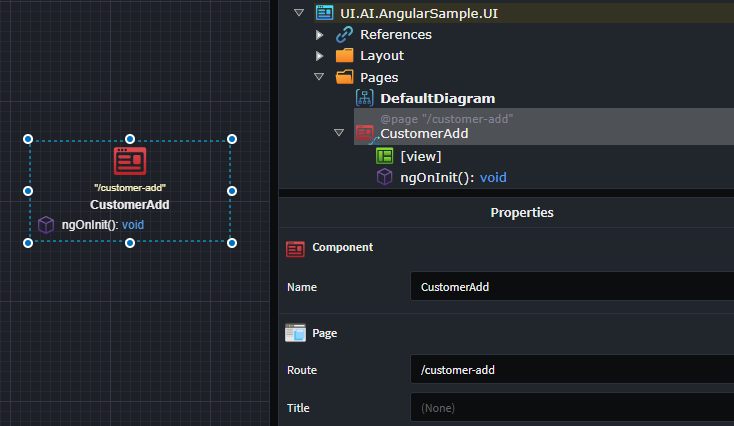
Modeling Pages
- Add a
Pageto a diagram in the UI Designer. - Name the
Pageto describe its function (e.g.,CustomerSearch,CustomerAdd). - (Optional) Adjust the route in the property pane.
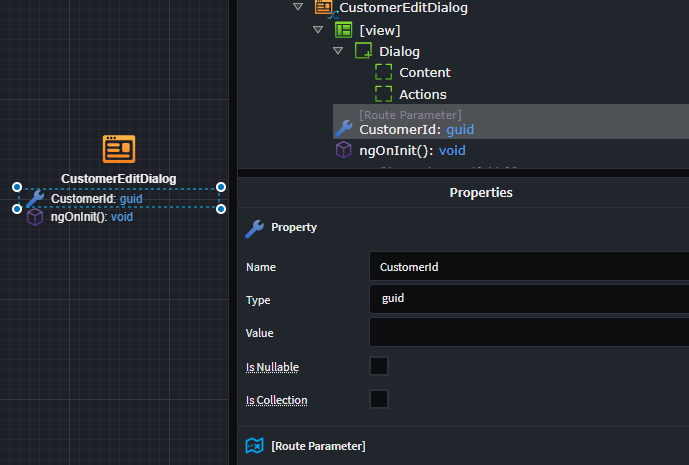
Adding Route Parameters to a Page
If your page needs Route Parameters (e.g., customers/edit/{customerId}):
- Right-click the
Page→ Add Property. - Name the property (e.g.,
CustomerId) and set its type (e.g.,Guid). - Apply the
Route Parameterstereotype to the property (press F3).
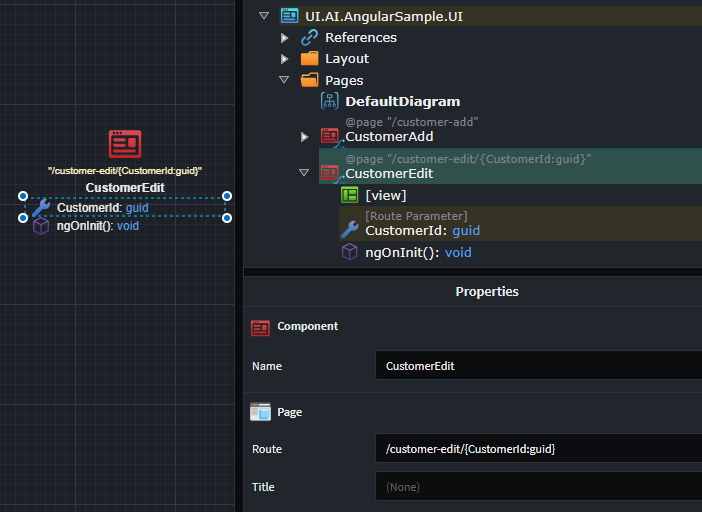
The page route updates automatically based on the route parameters.
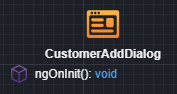
Modeling a Dialog
- Add a
Pageto a diagram in the UI Designer. - Name the
Pagewith a Dialog suffix (e.g.,CustomerAddDialog).
If your dialog needs parameters:
- Right-click the Dialog → Add Property.
- Name the property (e.g.,
CustomerId) and set its type (e.g.,Guid). - Apply the
Route ParameterorBindablestereotype (press F3).
Modeling UI Navigation
Navigation to a Page
- Right-click the
Page(or Dialog) → Add Navigation. - Connect the navigation arrow to the destination by left-clicking the target.
Navigation to a Dialog
- Right-click the
Component(Page or Dialog) → Add Operation. - Name the operation (e.g.,
AddNewCustomer). - Right-click the operation → Show Dialog.
- Connect the navigation to the dialog by left-clicking the destination.
If your Component has Route Parameters, a mapping dialog will open for you to bind those parameters. Usually, you add these parameters to your navigation Operation.

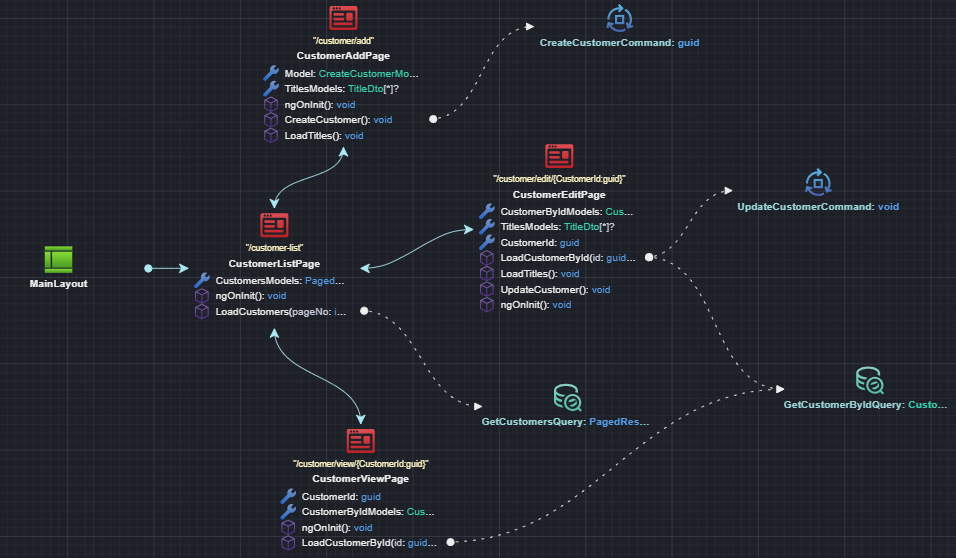
Connecting UI Components to Services in Other Applications
UI Components interact with services to retrieve data or trigger changes in the system. Model this as follows:
To use external services in your UI application:
- In the
User Interface Designer, under theUser Interface Package, right-clickReferences→Add a Package Reference. - In the
Package Reference Manager, select the package containing the services (e.g.,OtherApplication.Services).
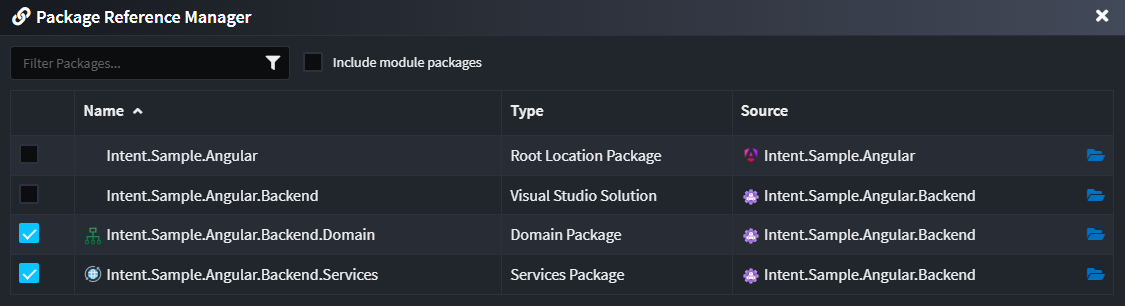
You can now use these external services in your UI diagrams.
- In the
Component's suggestions, clickCall Backend Service. - In the Call Backend Service dialog, select the service endpoint to call.
Note
If you don't see the desired services, remember to add a package reference to the Service Package containing those services in the UI Designer.
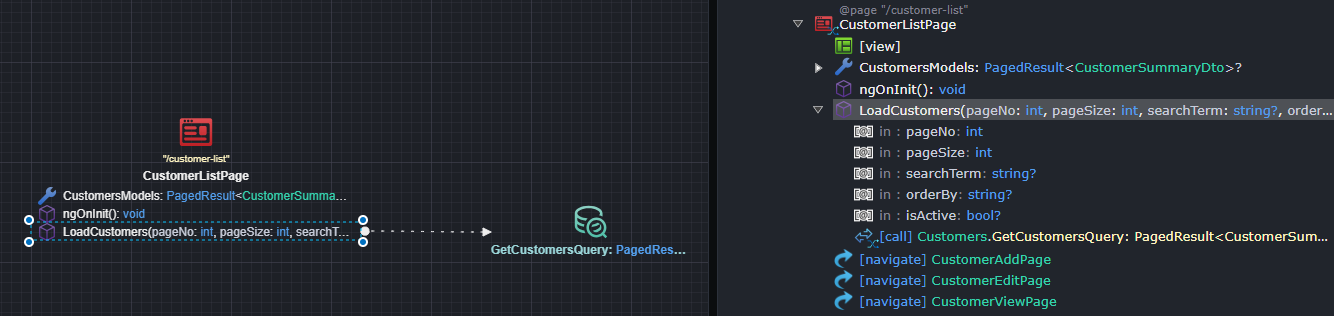
Depending on the service type:
- For
Querys: The result is added to theComponentas a property, and request parameters are modeled asOperationparameters. - For
Commands: A correspondingModel Definitionis created and added to theComponent, mapped to the command for invocation. ForCommands, you typically want a separate model for view concerns.
Note
You also need the appropriate integration module for remote communication. Currently, only Intent.Angular.HttpClients is supported (selected by default for new Angular applications).
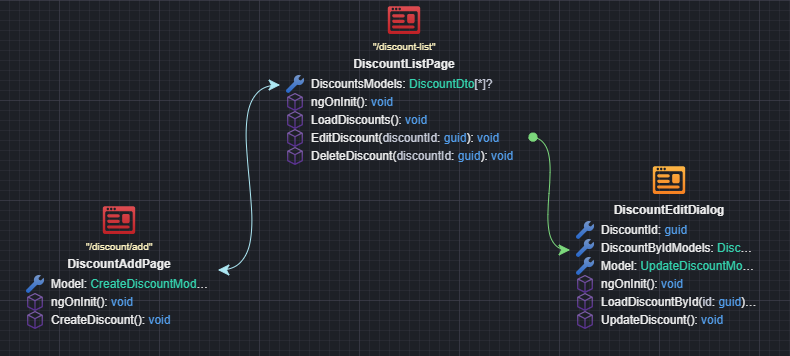
Pages using a Query and Command
For pages that use both a Query and a Command (for example, an Edit Page with a Query to retrieve the record by Id and a Command to update it), there is some additional configuration required.
When you use the Call Backend Service suggestion and select both the Query and Command, two properties are created:
- A property to store the response from the
Query(this will be of typeDto) - A property to store the information to be passed to the
Commandand bound to the UI controls (this will be of typeModel Definition)
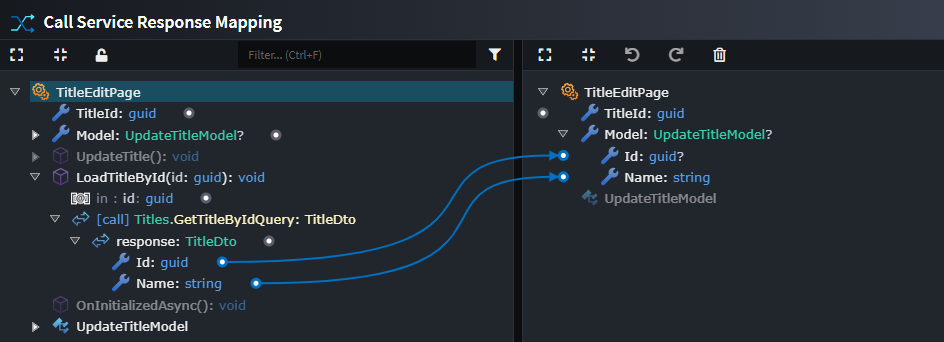
Perform the following steps to ensure the correct end-to-end data flow. Instead of having the data returned from the Query populate the Dto, it should populate the Model Definition:
- On the
Call Service Operation Actionto the GetByIdQuery (the dashed line between the page and theQuery), right-click and selectMap Response. - In the right panel, delete the
Dtoproperty completely (including its mappings), and then configure the mappings from the response on the left-hand side to theModel Definitionon the right-hand side.
This ensures that the data returned from the Query call is stored in the Model Definition property, which is then bound to the UI controls and used when invoking the update Command.
Here is an example of what the Query mapping should look like after being updated. Instead of the response being mapped to a Dto, it is mapped to the model.
Implementing Your View with AI
Tip
Install the Intent.AI.Angular module and connect Intent Architect to your preferred LLM API. Ensure User Settings are complete, including a valid API key. Prompt results will vary by provider and model-experiment to find what works best for you.
Once your View Model design is ready, use the Angular AI accelerator to generate the remaining implementation details.
Note
Always apply your Software Factory before running AI prompts, as the generated code is used as input/context for the AI.
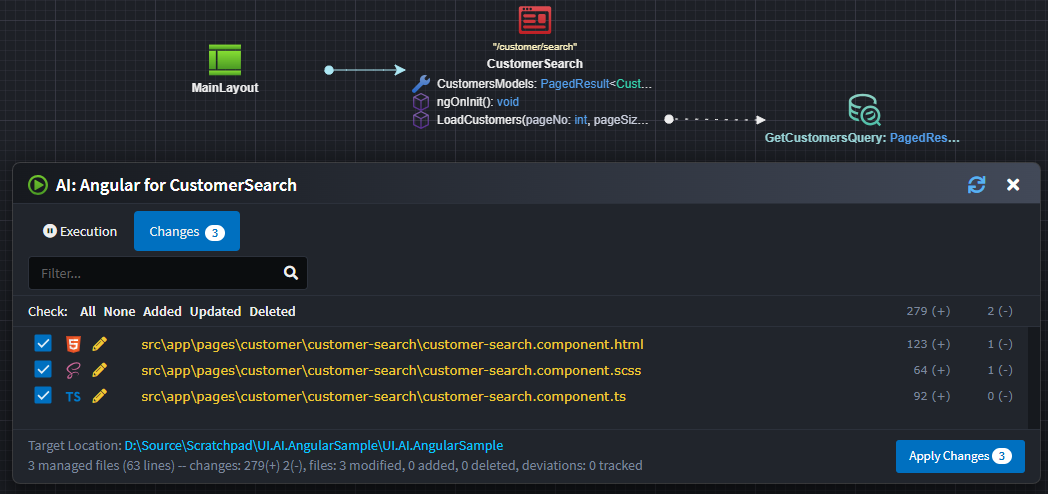
Generate Your View with AI
- Run and apply the Software Factory.
- Right-click the
Component→ Implement with AI. - (Optional) Adjust settings in the AI Prompt dialog.
- Click Done - Intent Architect will generate and submit a prompt to the LLM (this may take a while).
- Review the AI's proposed changes as a code diff.
- Click Apply to accept the changes.

Note
AI is non-deterministic. While we strive for predictability, results will vary. Test and adjust as needed.
Implementing Your Layout with AI
- Run and apply the Software Factory.
- Right-click the
Layout→ Implement with AI. - (Optional) Adjust settings in the AI Prompt dialog.
- Click Done - Intent Architect will generate and submit a prompt to the LLM.
- Review the AI's proposed changes as a code diff.
- Click Apply to accept the changes.
For a Layout, the AI will generate a menu structure based on navigation items. You can manually add or adjust menu items (such as ordering) as needed in the layout html file.
Application Styling
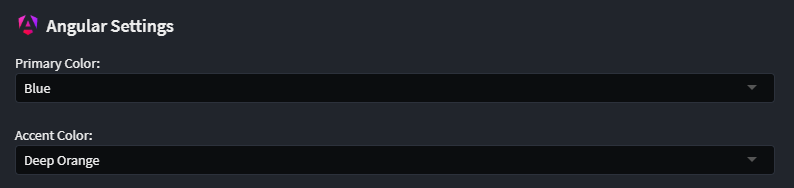
By default, the application uses two stylesheets - styles.scss and theme.scss - which leverage Material themes. You can update or modify these files (and component-specific stylesheets) to suit your branding.
If you use the default implementation, you can adjust the primary and accent color themes in Application Settings:
Improving AI Results
You may get good results with the default AI prompt, but you can further improve outcomes with these techniques:
Add User Prompt Context
Usually, you don't need to provide extra context, but if the LLM repeats mistakes or needs more guidance (e.g., how to refactor code), add instructions in the AI dialog. Examples:
- "Ensure buttons/actions exist for the new navigations I added."
- "Refresh the grid if the add customer dialog closes successfully."
- "Ensure you have controls for adding and removing addresses."
Use a Template
Select a template to guide the AI. Templates provide:
- Additional rules and guidance
- Sample implementations
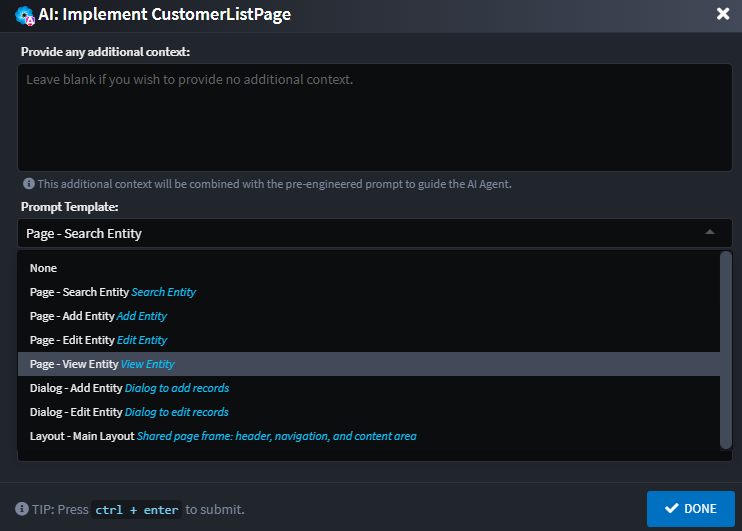
Several pre-configured Material templates exist for different Pages and Dialogs. Templates are auto-selected based on your Component naming convention (this can be adjusted).
| Template | Keywords |
|---|---|
| Page - Search Entity | search, find, list, lookup |
| Page - Add Entity | add, create, new, insert, register |
| Page - Edit Entity | edit, update, modify, change |
| Page - View Entity | view, details, detail, show |
| Dialog - Add Entity | dialog, add, create, new, insert |
| Dialog - Edit Entity | dialog, edit, update, modify, change |
Note
Templates can be customized, extended, or replaced. You can even adapt them for a different component library.
Provide an Example
If you have a similar screen, select it in Example Components to submit its code as guidance for the AI.
Sometimes, the LLM may generate different layouts for Add Entity and Edit Entity pages. Using an Example Component and extra context (e.g., "ensure the layout of the edit page is the same as the add page") helps align layouts.
Keep Your ViewModel Managed
This approach combines deterministic and non-deterministic code generation:
- Everything you model is generated deterministically by the Software Factory in the ViewModel (e.g.,
customer-add.component.ts). - The AI/LLM generates code in the View (e.g.,
customer-add.component.htmlandcustomer-add.component.scss) and may also update the ViewModel.
Considerations:
- The ViewModel uses Merge mode by default, allowing both systems to operate together.
- If the AI changes deterministic code in the ViewModel, the Software Factory may not merge changes automatically and could undo or duplicate code blocks.
- Ideally, refactor code and/or add explicit Code Management instructions so Intent Architect can merge code automatically.
- If merging is not possible, use the
@IntentIgnore()decorator.
Known Issues and Limitations
We are actively working to address the following issues:
- Multiple AI agent execution:
Implement with AIruns per page/component. If you make a change affecting multiple pages (e.g., adding an "Add Entity" page along with a navigation to a "Search" page), you must runImplement with AIon each page for full functionality. - Import removal: If page A references page B, an
importis added to page A. If page B is deleted or the reference is removed, theimportis not automatically removed, which may cause build errors. Manually remove any unusedimportstatements. - Traditional Services Support: Only CQRS Services are officially supported. Traditional Services may partially work but are not fully tested. Full support is in progress.
- Limited Weaving Capabilities (vs. C#): TypeScript weaving is less mature than C#. Some IntentMerge scenarios may not work as expected; use IntentIgnore as needed.
Angular AI Prompt Augment and Customization Through Templates
The Angular AI prompting can be further extended through AI Prompt Templates. Out of the box these come pre-configured for Material, but the system is simple and extensible. Embrace it, extend it, or completely re-configure it - the choice is yours.
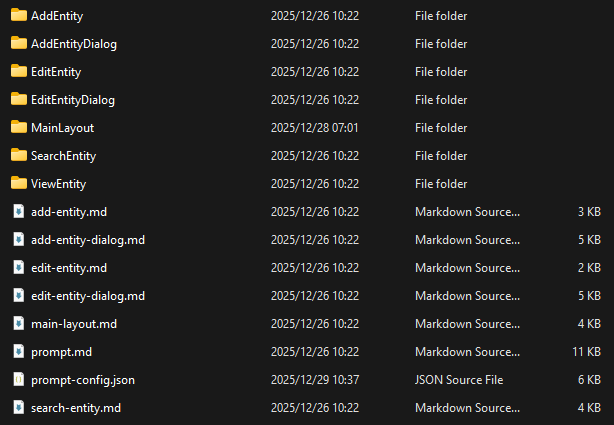
Look in the following folder within your Intent Architect Solution:
.\intent\AI.Prompt.Templates\{application name}\Intent.Modules.AI.Angular.Generate
You will find:
prompt.md(generic prompt rules, limitations and instructions)prompt-config.json(prompt configuration)- Folders containing sample code files for the various templates
- Template specific markdown (template specific rules, limitations or instructions
Prompt Overview
The main prompt (prompt.md) is a readable markdown file, which can be adjusted to suite your specific rules and requirements.
This file contains the generic rules, limitations and instructions for the prompt, including:
- Component Libraries (including versions)
- Styling guides and rules (using Material)
- Rules for when and how to modify existing code
- Rules for navigation between components
Template Specific Prompt
Each template also has its own markdown file (e.g. add-entity.md) which contain any additional template specific rules to be passed to the LLM.
JSON Schema Overview
The prompt-config.json file defines templates which define reusable AI prompt blueprints for common scenarios (e.g., Search Page, Add Dialog). They include:
- id → Unique identifier
- name → Human-friendly label
- description → What the template does
- applicability → Keywords that help Intent Architect pick the most appropriate template
- template-folder → The folder containing sample files
Example Template: Search Entity Page
{
  "id": "SearchEntity",
  "name": "Page - Search Entity",
  "description": "Search Entity",
  "applicability": {
    "key-words": [
      { "word": "search", "weight": 3 },
      { "word": "list", "weight": 3 }
    ]
  },
  "template-folder": "SearchEntity"
}
Example Template Types
The schema already defines several templates:
Page Templates
SearchEntity→ Generates search/listing pagesAddEntity→ Generates entity creation pagesEditEntity→ Generates entity update pagesViewEntity→ Generates read-only entity views
Dialog Templates
AddEntityDialog→ Generates dialogs for adding entitiesEditEntityDialog→ Generates dialogs for editing entities
Each template includes its own rules to ensure compliance with Material and project conventions.
Extending Configuration
To extend the configuration:
- Add new rules in
prompt.md(global) or under a specifictemplatemarkdown. - Create a new template in
prompt-config.jsonby adding an object undertemplates.- Define keywords under
applicability. - Specify a
template-folderwith an example implementation.
- Define keywords under
Example A: Bulk Import Entities
The entry in prompt-config.json:
{
  "id": "BulkImportEntities",
  "name": "Page - Bulk Import Entities",
  "description": "Upload a CSV/Excel file, preview parsed rows, validate, and commit in bulk.",
  "applicability": {
    "key-words": [
      { "word": "import", "weight": 3 },
      { "word": "upload", "weight": 3 },
      { "word": "bulk", "weight": 3 },
      { "word": "csv", "weight": 2 },
      { "word": "excel", "weight": 2 },
      { "word": "batch", "weight": 2 }
    ]
  },
  "template-folder": "BulkImportEntities",
  "metadata": {},
  "rules": [

  ]
}
Examples rules defined in bulk-import-entities.md:
### Form generation rules
- Provide a file input and a server-side parse action. Reuse existing parse, validate, and commit methods where available.
- Use official enum values for component parameters. Do not use raw strings.

### Save behavior
- Disable `Commit` until there are no blocking validation errors.
- Show success and error toasts/dialogs using existing notification services where present.
Example B: Upsert Template
The entry in prompt-config.json:
{
  "id": "AddOrUpdateEntity",
  "name": "Page - AddOrUpdate Entity",
  "description": "Create a new entity or update an existing one, using a single page flow (upsert).",
  "applicability": {
    "key-words": [
      { "word": "add", "weight": 3 },
      { "word": "create", "weight": 3 },
      { "word": "new", "weight": 2 },
      { "word": "insert", "weight": 2 },
      { "word": "register", "weight": 2 },
      { "word": "update", "weight": 3 },
      { "word": "edit", "weight": 3 },
      { "word": "modify", "weight": 2 },
      { "word": "change", "weight": 2 },
      { "word": "upsert", "weight": 3 },
      { "word": "save", "weight": 2 }
    ]
  },
  "template-folder": "AddOrUpdateEntity"
}
Examples rules defined in add-or-update-entity.md:
### General behavior
- Reuse existing backing methods if present (e.g., SaveEntityAsync, UpdateEntityAsync, LoadEntityAsync). Do not invent new ones if appropriate methods already exist.
- If an Id or key is present in the model or route, treat the page as Update; otherwise treat as Add.

### Form generation rules
- Always use official enum values for component parameters (no raw strings).
✅ With this setup, you can tailor AI prompt behavior, enforce conventions, and even use a different Angular component library.