Create Pet Clinic for the .NET C# Technology Stack
Prerequisites
- Ensure Intent Architect has been installed.
- The latest Microsoft Visual Studio for Windows/Mac, JetBrains Rider, or any other IDE capable of working with .NET projects.
Create a new Application
On the home screen, click Create a new application.
Select the Clean Architecture.NET Application Template.
Fill in a Name (such as PetClinicApp), review/change the Location as desired and click NEXT.
Leave the selected application components as is and click CREATE.
Note
At this point Intent Architect is busy downloading and installing Clean Architecture.NET associated modules, this progress can be seen in the 'Task Output'. The Task Output dialog can be opened at any time by clicking on the text at the bottom-left corner of the window which shows the name of any currently executing task or otherwise says "Ready".
Create the Domain Entities
Click on Domain on the left of the window to enter the designer.
Out the box, the designer will add, and open, a Default Diagram to start visual modelling on.
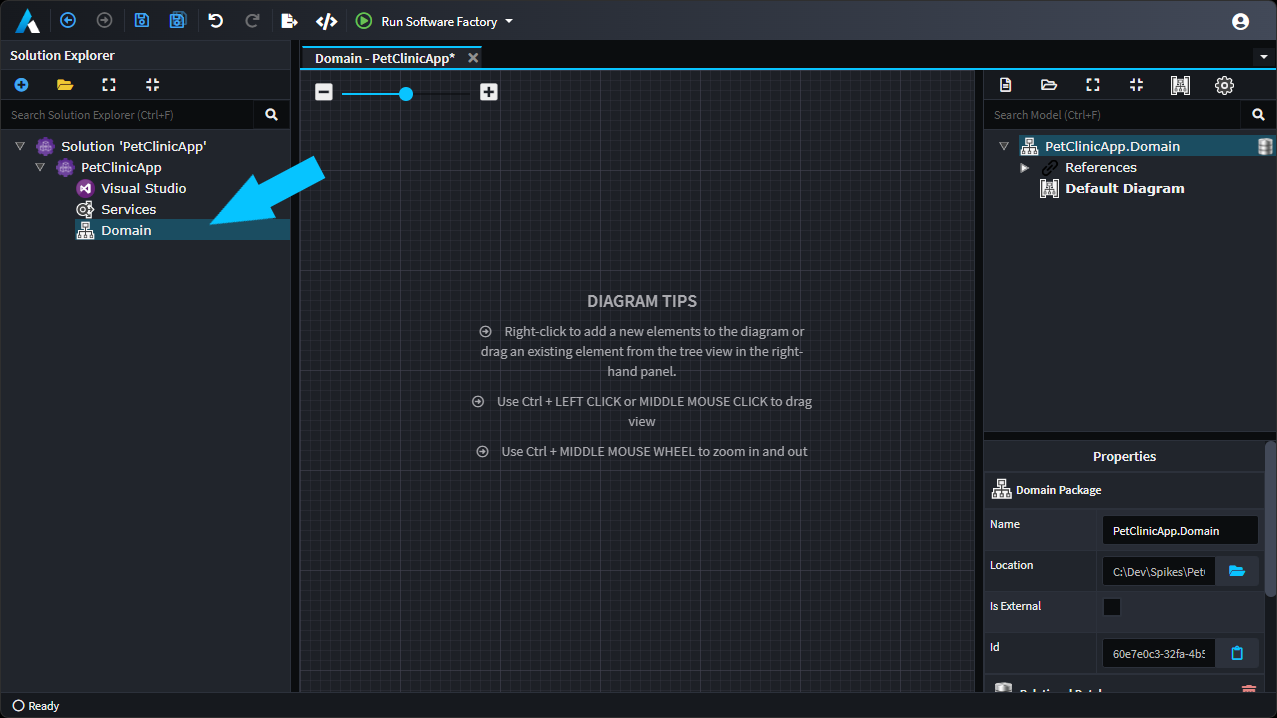
This is where the "business domain" will be modelled using a UML class relationship diagram which Intent Architect will use to generate C# classes and ultimately a database schema.
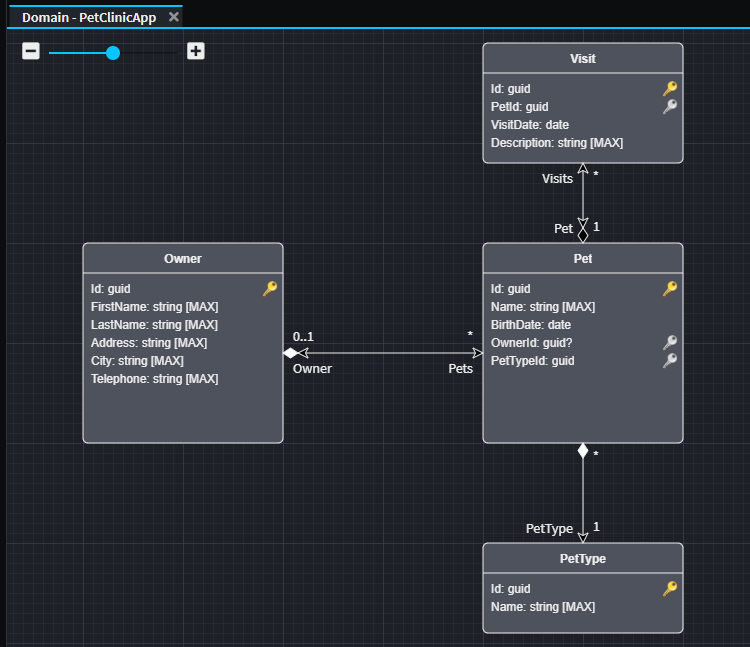
This PetClinic application's business domain requires the following entities (concepts) to be modelled:
PetOwner(to which aPet"belongs to")Visit(to represent each visit by aPetto the PetClinic)
Entities can be added to the domain designer by right-clicking on the background and selecting the New Class option. Alternatively, they can also be added in the tree view by right-clicking on a folder and similarly selecting the New Class option.
Create a Pet entity and then right-click it (on either the visual diagram's block or the tree view element) and then select the Add Attribute option to add the following attributes:
Nameof typestringBirthDateof typedate
Note
An Id Primary Key attribute has been automatically added to our Pet entity because we've configured the Database settings to use Explicitly add PKs and FKs automatically and its type was set to guid due as per the Key Type setting.
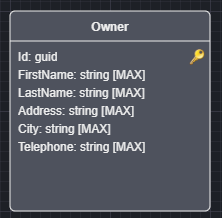
Create an Owner entity with the following attributes:
FirstNameof typestringLastNameof typestringAddressof typestringCityof typestringTelephoneof typestring
Tip
Follow this shortcut demonstration to add multiple attributes without using the mouse.
The Owner entity should appear as follows:
Specify the relationships between entities
Specifying relationships between entities in the Intent Architect designers can be initiated by right-clicking on an entity in the visual diagram, then selecting the New Association option and the creation is completed by clicking on the other class which you want to be the target of the relationship.
Note
Refer to this article if you wish to learn more about Associations.
Create an association between Owner and Pet:
- Right-click on the
Ownerentity. - Click on the
New Associationoption. - Click on the
Petentity which completes the creation of the association. - In the property pane (in the bottom-right corner of the window) within the
Target Endsection ensure thatIs Collectionis checked. - In the property pane within the
Source Endsection ensure thatIs Collectionis unchecked,Is Nullableis checked and thatNavigableis checked.
Set up a Visit entity to be as follows:
- Add a
Visitentity. - Add an association from
PettoVisit:- In the property pane (in the bottom-right corner of the window) within the
Target Endsection ensure thatIs Collectionis checked. - In the property pane within the
Source Endsection ensure thatIs Collectionis unchecked and thatNavigableis checked.
- In the property pane (in the bottom-right corner of the window) within the
- Add the following attributes:
VisitDateof typedate.Descriptionof typestring.
Also set up a PetType entity in a similar way:
- Add a
PetTypeentity. - Add an association from
PettoPetType:- In the property pane (in the bottom-right corner of the window) within the
Target Endsection, ensure thatIs Collectionis unchecked. - In the property pane within the
Source Endsection, ensure thatIs Collectionis checked.
- In the property pane (in the bottom-right corner of the window) within the
- Add the following attributes:
Nameof typestring.
Create Services
Click on the Services designer located in the left panel. This is where API Services can be modelled to interact with the entities modelled in the domain designer.
Now we will create a CQRS style Service for adding and retrieving Owners.
Create a
FoldernamedOwners, this folder represents our Owners service and will contain it's associatedCommands andQuerys.Right-click on the
Ownersfolder and selectNew Command. Name itCreateOwnerCommandwith a return type ofGuid, this will be the newly createdOwner's Id.
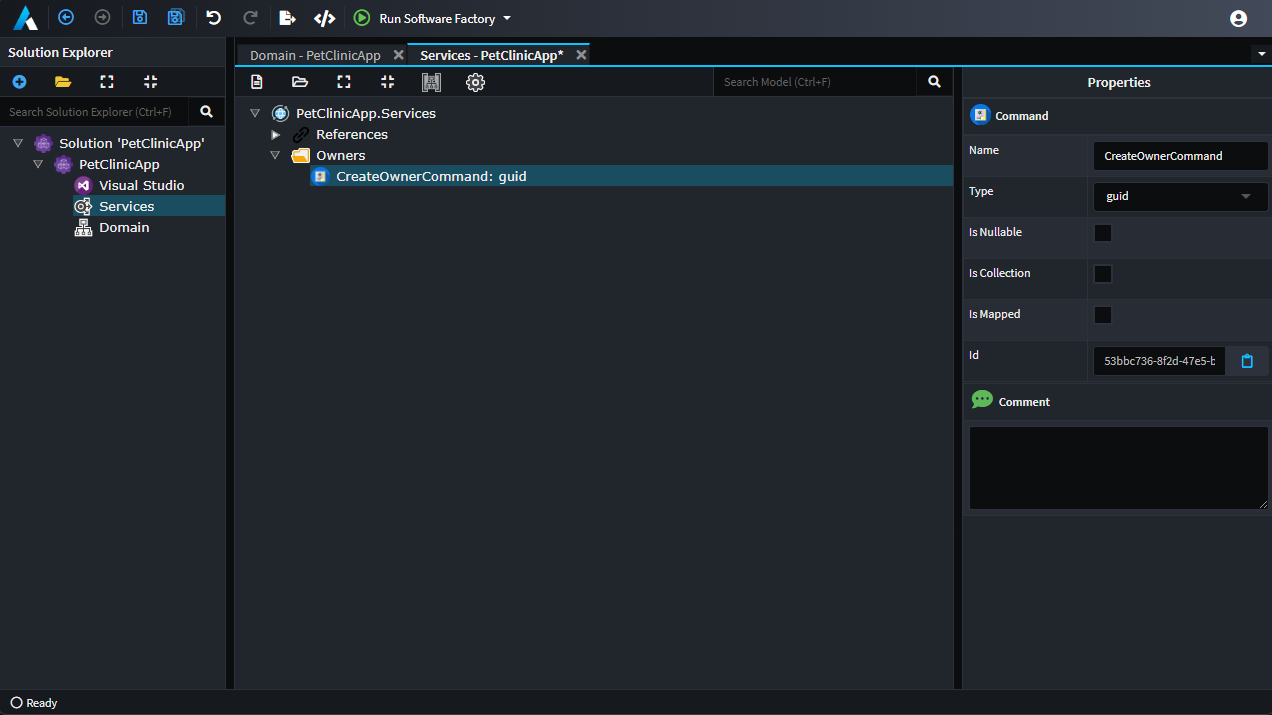
Right-click on the CreateOwnerCommand command and select Map to Domain Data.
In the expanded Dropdown choose Owner, in the TreeView check the following:
FirstNameLastNameAddressCityTelephone
Click Done.
To retrieve the Owner we first need to describe the data contract our application will return.
- Right-click on the
Ownersfolder and selectNew DTO. - Name it
OwnerDto - Right-click on the
OwnerDtoand selectMap From Domain - Check the box next to
Ownerto select all the attributes - Click
Done.
Note
Project to Domain and Map from Domain are both options for creating mappings between Domain Entities and Dto's. Project to Domain is typically used for in-bound Dto's which tend to be more loosely coupled to the domain, Map from Domain is typically used for out-bound Dto's
Now let's add the Query
- Right-click on the
Ownersfolder and selectNew Query. - Name it
GetOwnersQuerywith a return type ofOwnerDto. - Check the
IsCollectionoption in the Properties window on the right.
The final thing we need to do is to configure how our service will be distributed.
- Select both 'CreateOwnerCommand' and 'GetOwnersQuery'
- Right-click and select
Expose as Http Endpoint
Click the Save All icon.
Generate the Code
Click the Run Software Factory button located near the top right of the window.
Once the staged Changes comes into view, you can review the proposed code changes.
Tip
The Filter box near the top-right of the Software Factory Execution modal can be used to help quickly locate particular files.
Tip
You can double-click on entries to have Intent Architect start up an external "diff" tool which you can use to review the proposed changes to a particular file. By default Intent Architect will use Visual Studio Code if it can find it; otherwise, you can manually configure any other "diff" tool in Settings.
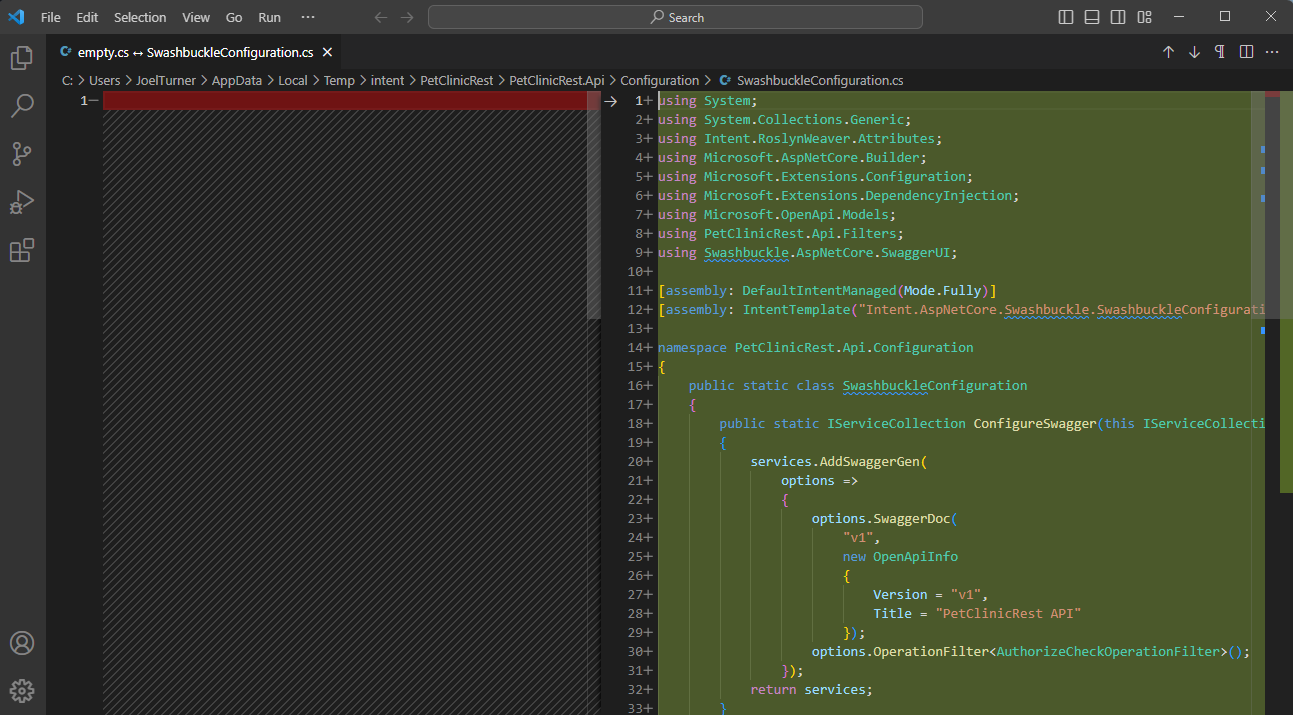
Click APPLY CHANGES and then minimize the Software Factory Execution by using the "_" icon near the top-right.
Note
When the Software Factory Execution is minimized, it is now watching for any saved changes to the Intent Architect Application or its Modules and will re-run itself should any be detected.
Test the generated application's back-end
We now want to open the generated application's .sln file. The easiest way to locate the .sln file is to click on Settings in the left bar of Intent Architect. Beneath the Relative Output Location: text box is a clickable link which will open the Output Location in your operating system's file browser:
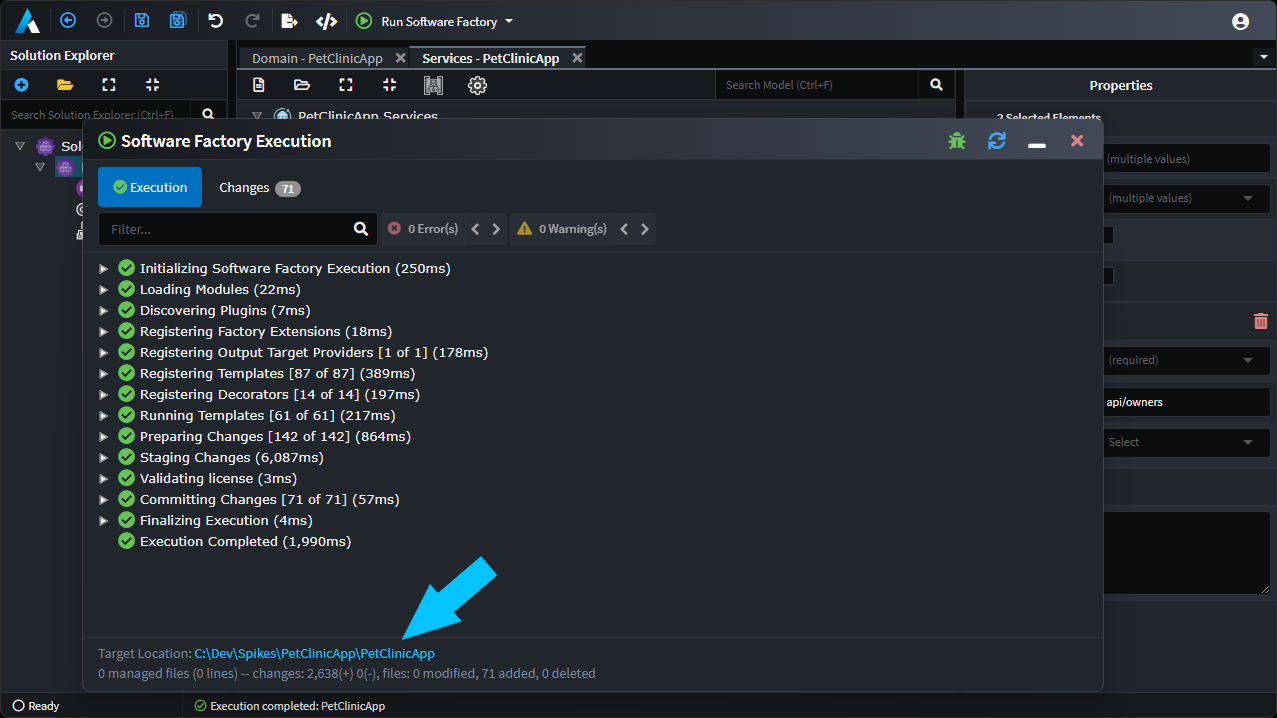
Open the .sln file using your preferred .NET capable IDE and then ensure that the startup project is set to the .WebApi one, then compile, and run the solution.
If you're running Visual Studio, it should automatically open the website in your browser. Append /swagger to the URL and press your return key to navigate to it.
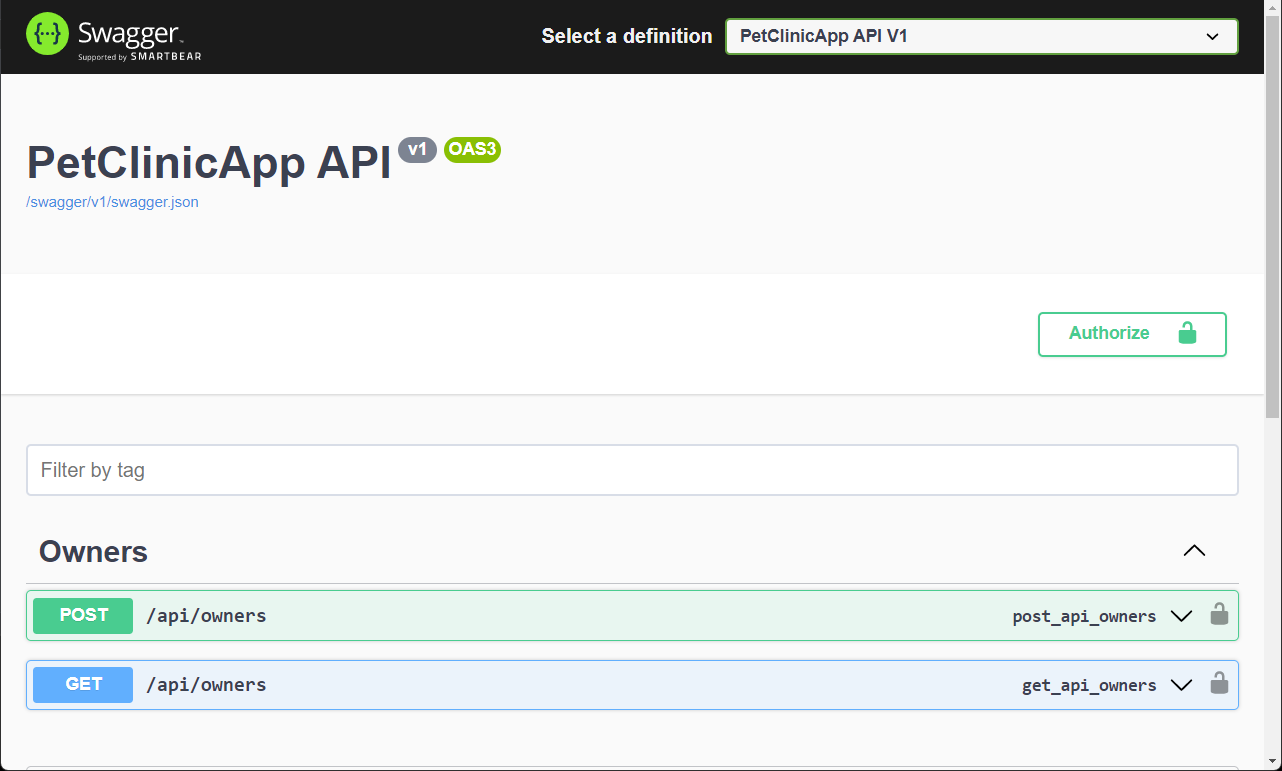
Click on the POST version of the /api/Owner panel and then click on the Try it out button.
Paste the following in the request body text box:
{
  "firstName": "Sherlock",
  "lastName": "Holmes",
  "address": "221B Baker Street",
  "city": "London",
  "telephone": "020 7234 3456"
}
Click on the blue Execute button.
It should show a success result which means that the application should have added an entry with the above details to its database.
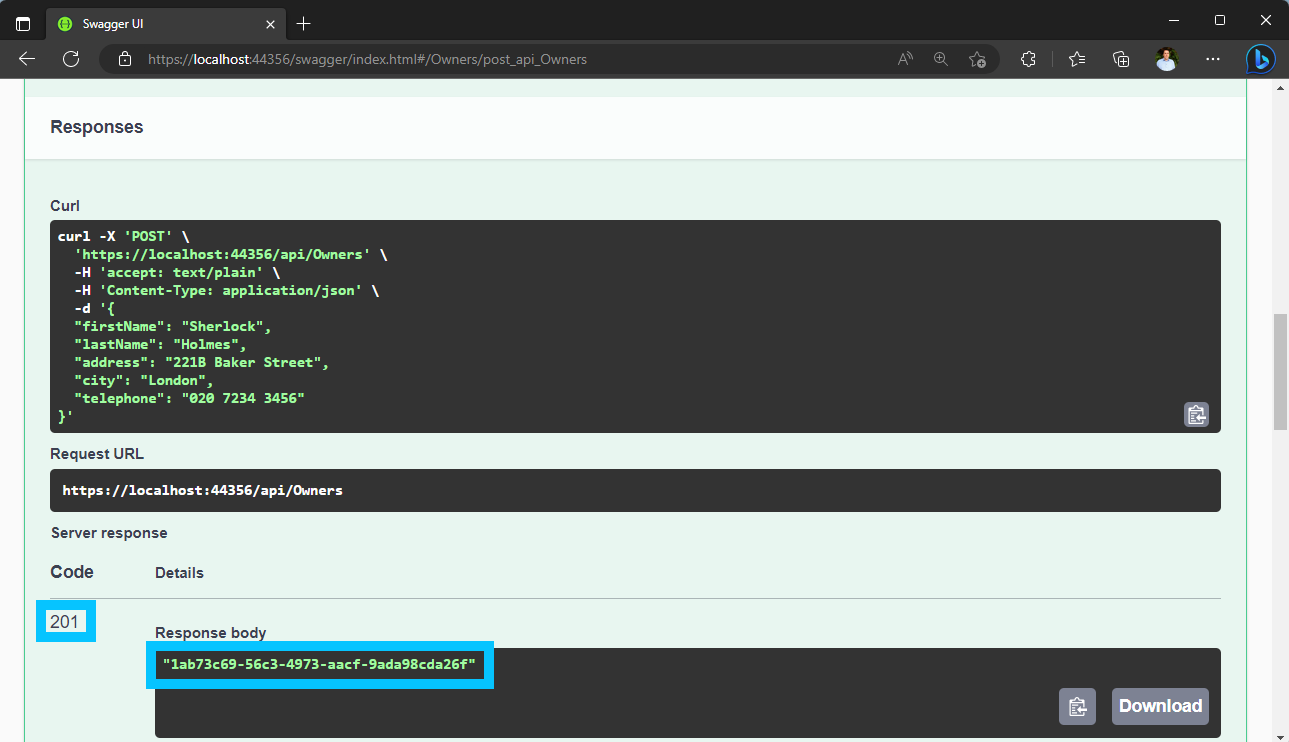
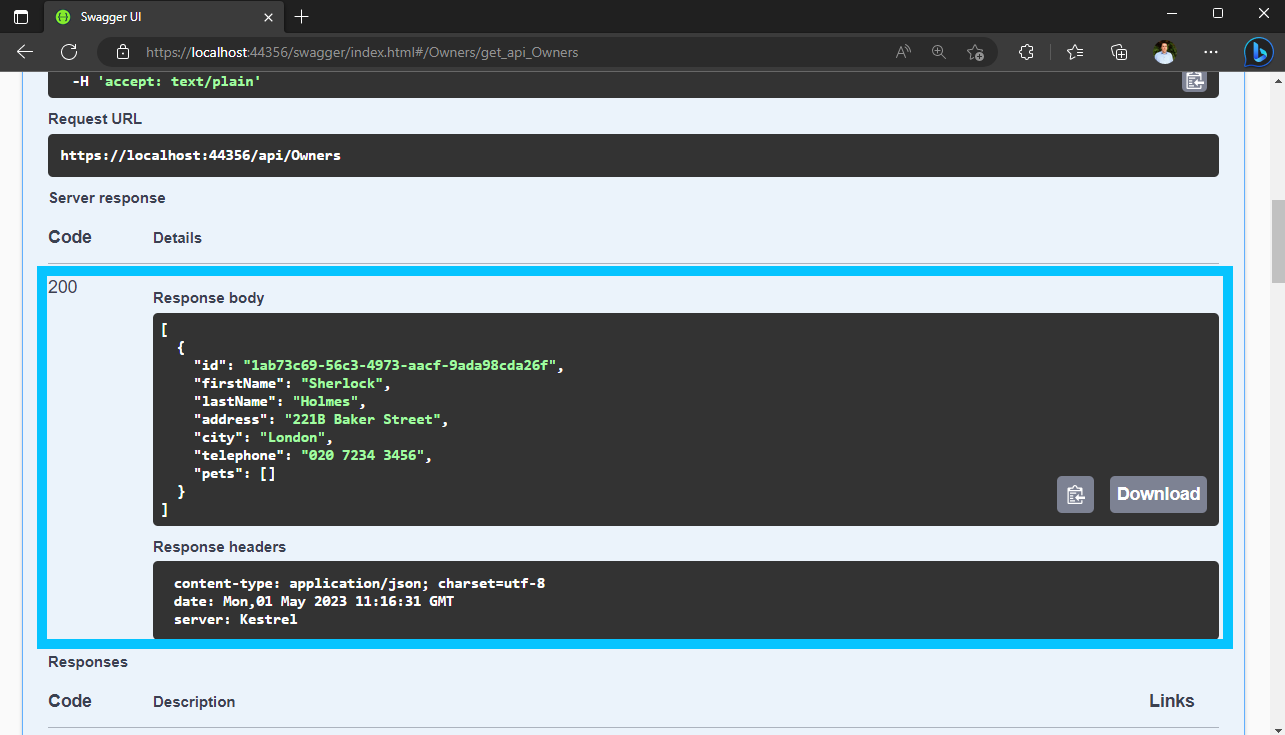
To see the database record inserted above, in Swagger now click on the GET version of the /api/Owner panel and click on the Try it out button followed by clicking on the blue Execute button.
It should also have a success result as well as an array of JSON results including the entry you created above.
What's Next
Finish the Implementation
- Create additional CRUD services.
- If you wish to continue exploring the concepts covered by this tutorial you can make new services, operations, and DTOs to cover additional use cases towards a complete implementation of the PetClinic.
Get the completed solution
Alternatively, you can view the fully-fledged solution for multiple programming languages on Github.