The "Hello World" tutorial
Overview
This tutorial is designed to to give you a feel for what Intent Architect can do, and let you experience the common work flows of the tool. This tutorial covers the basics of:
- Creating an Intent Architect application
- Configuring your Architecture
- Designing your application through modeling
- Realizing your designs as code
By the end of the tutorial you will have built a complete ASP.NET Core web application, implemented using Clean Architecture design patterns, with some basic use cases.
This tutorial should take around 5 minutes.
Create your first Intent Architect application
- Open Intent Architect.
- Click
Create a new solution.

On the first screen of the wizard you can select your desired architecture. For this tutorial select the ASP.NET Core - Clean Architecture option.
- Select the
ASP.NET Core - Clean Architectureapplication template.
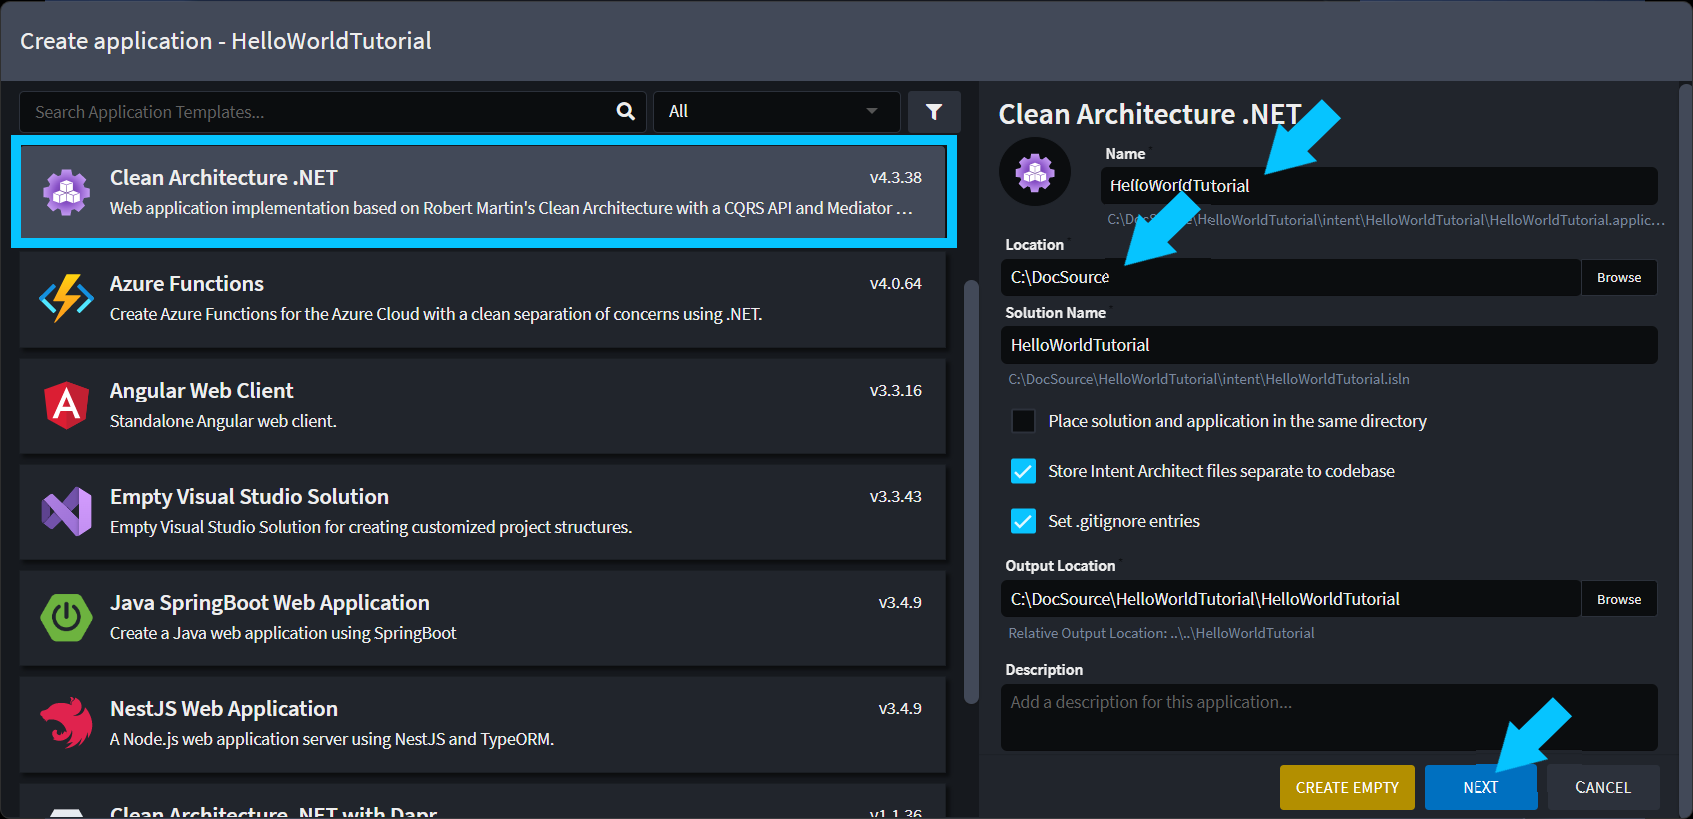
In the Create New Solution screen, give your solution and application the name HelloWorldTutorial.
- Click
Select Components.

This screen allows you to configure your selected Architecture, for the tutorial you are just going to use the default configuration.
- Click
Create.
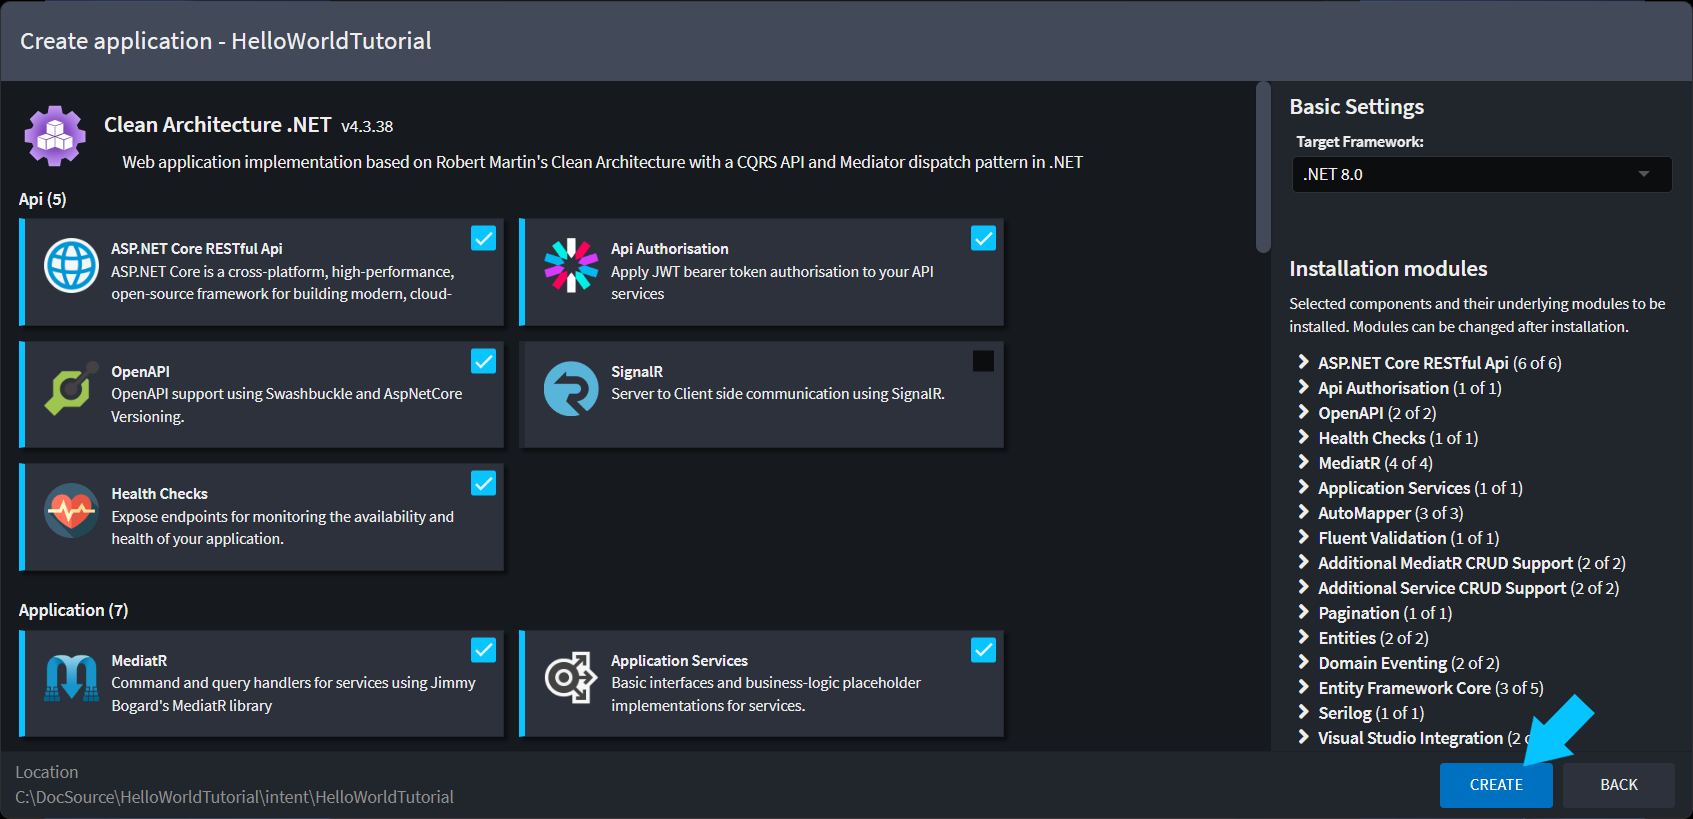
- Intent Architect will now configure your application based on your choices in the setup wizard.
- You will be navigated to the Intent Architect Solution view.
- The Application's icon in the left pane is a spinner while Intent Architect downloads and installs Modules for it.
- When the process is complete the spinner will change to a static icon and the status at the bottom left of the UI will show
Ready.
You have successfully created an Intent Architect application.

Next you will be designing the more functional aspects of your application, starting with Domain modeling.
Model your domain
The Domain Designer is where you model your business/problem domain (the concepts that exist in your problem space, what data they have, how are they related, etc.).
- Open the
DomainDesigner.
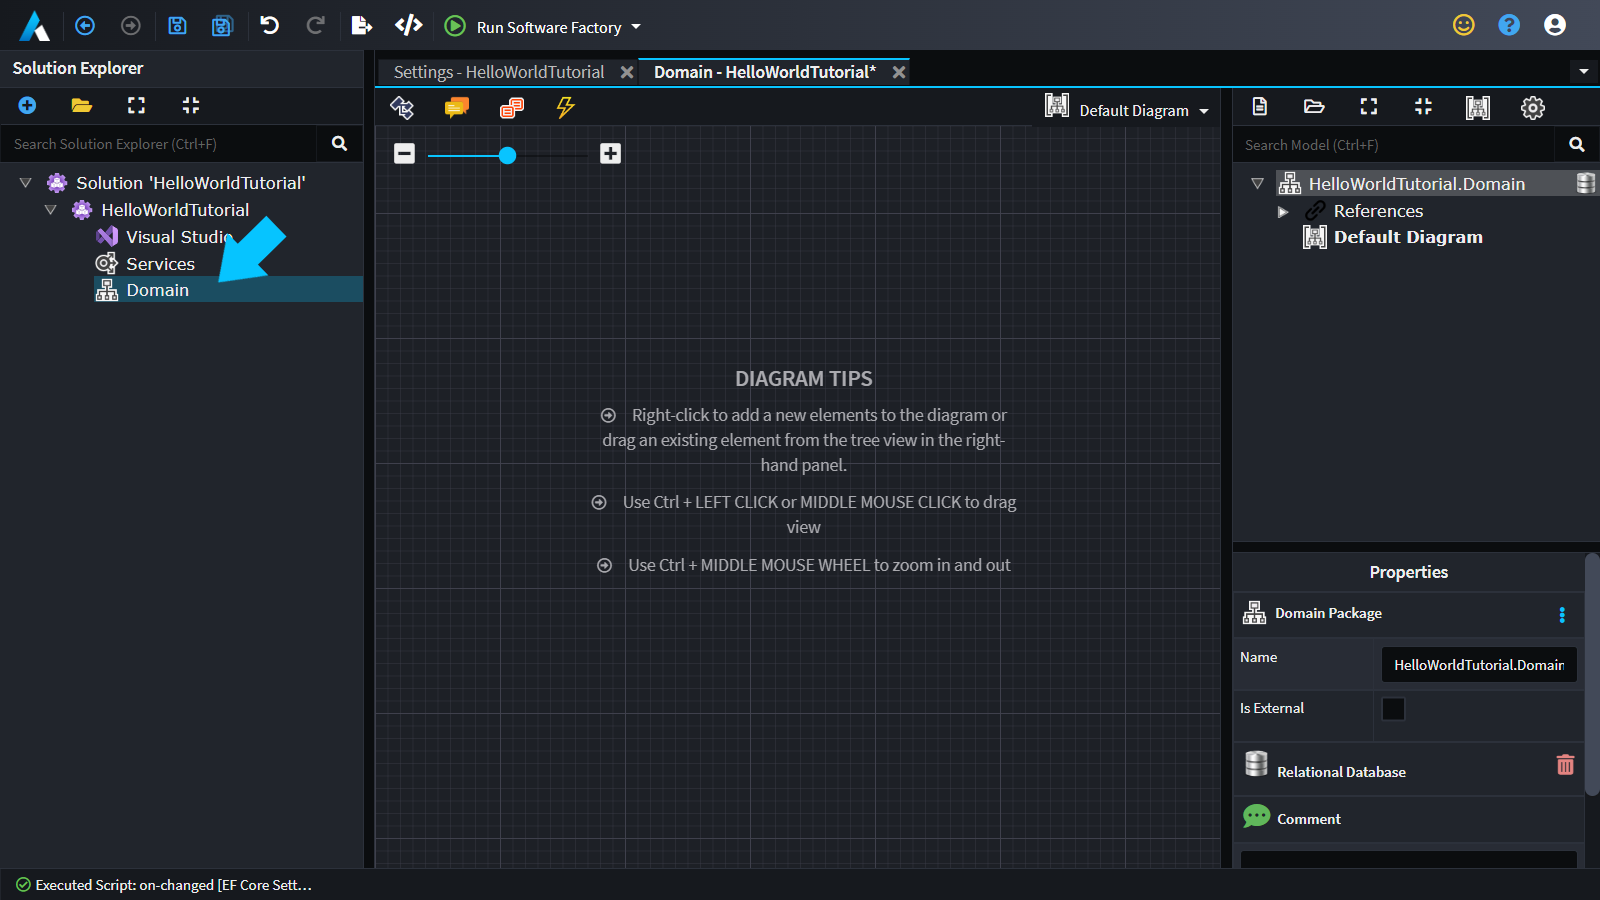
- Right-click anywhere on the grid, and select
New Entity. - Change the name to
Planet. - Right-click on the
Planetentity, and selectAdd Attribute. - Name the attribute
Nameof typestring. - Save the domain (
ctrl+s).
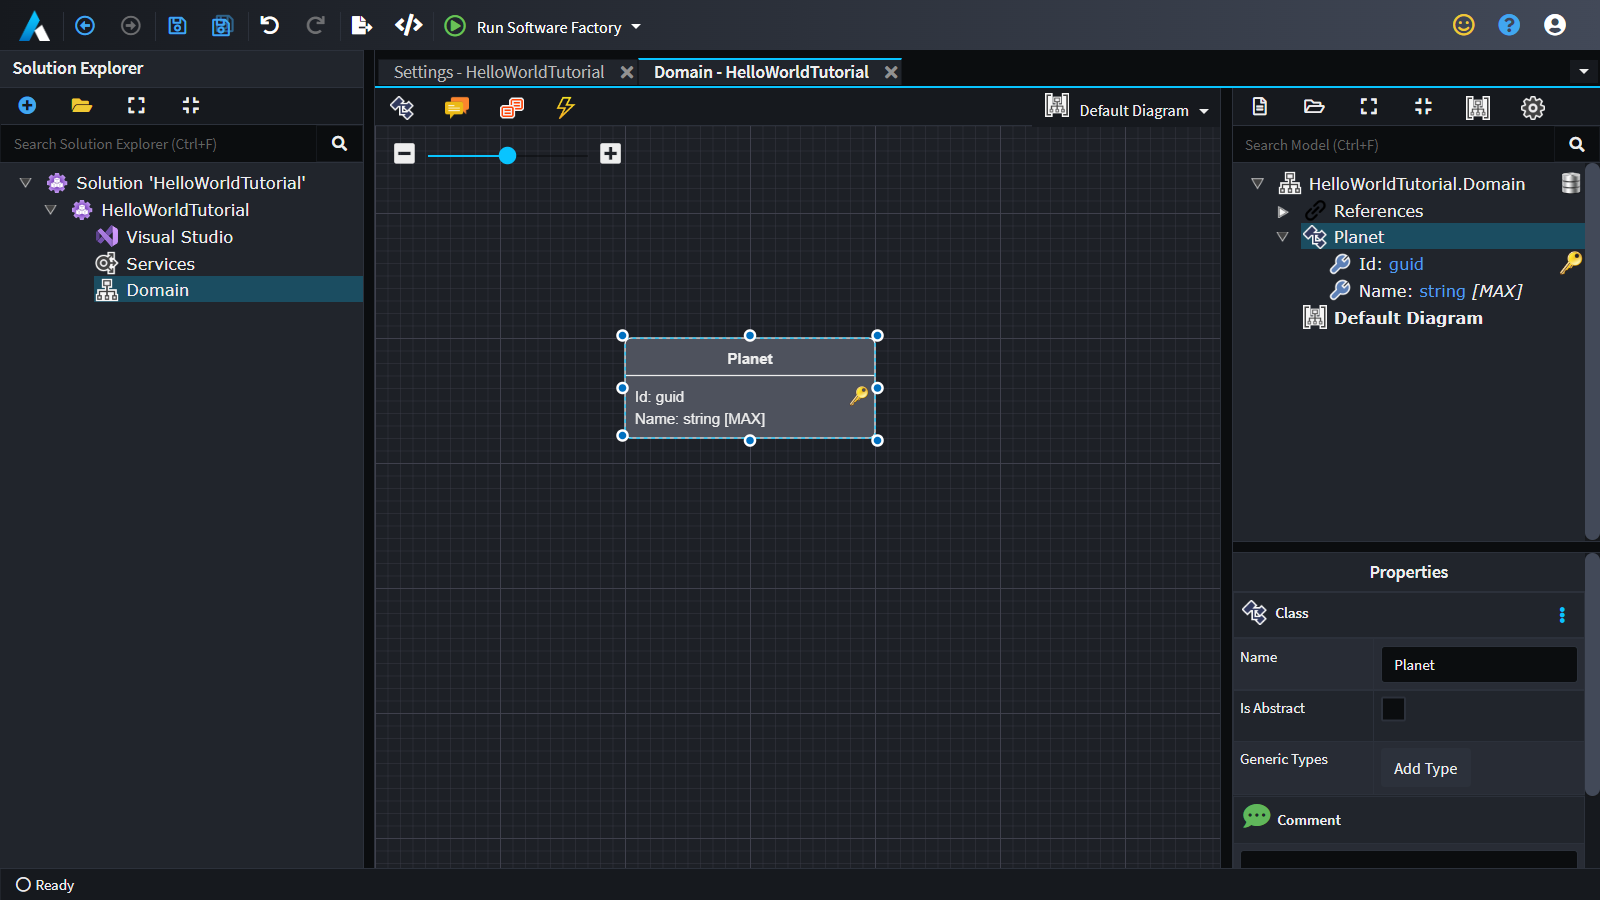
Note
This is the simplest domain model possible for the purposes of the "Hello World" tutorial. Real world domain models are much more complex and interesting. If you want know more about domain modelling check out our Intent Architect Webinar on Domain Modeling in .NET.
Next you will be moving onto the Services Designer.
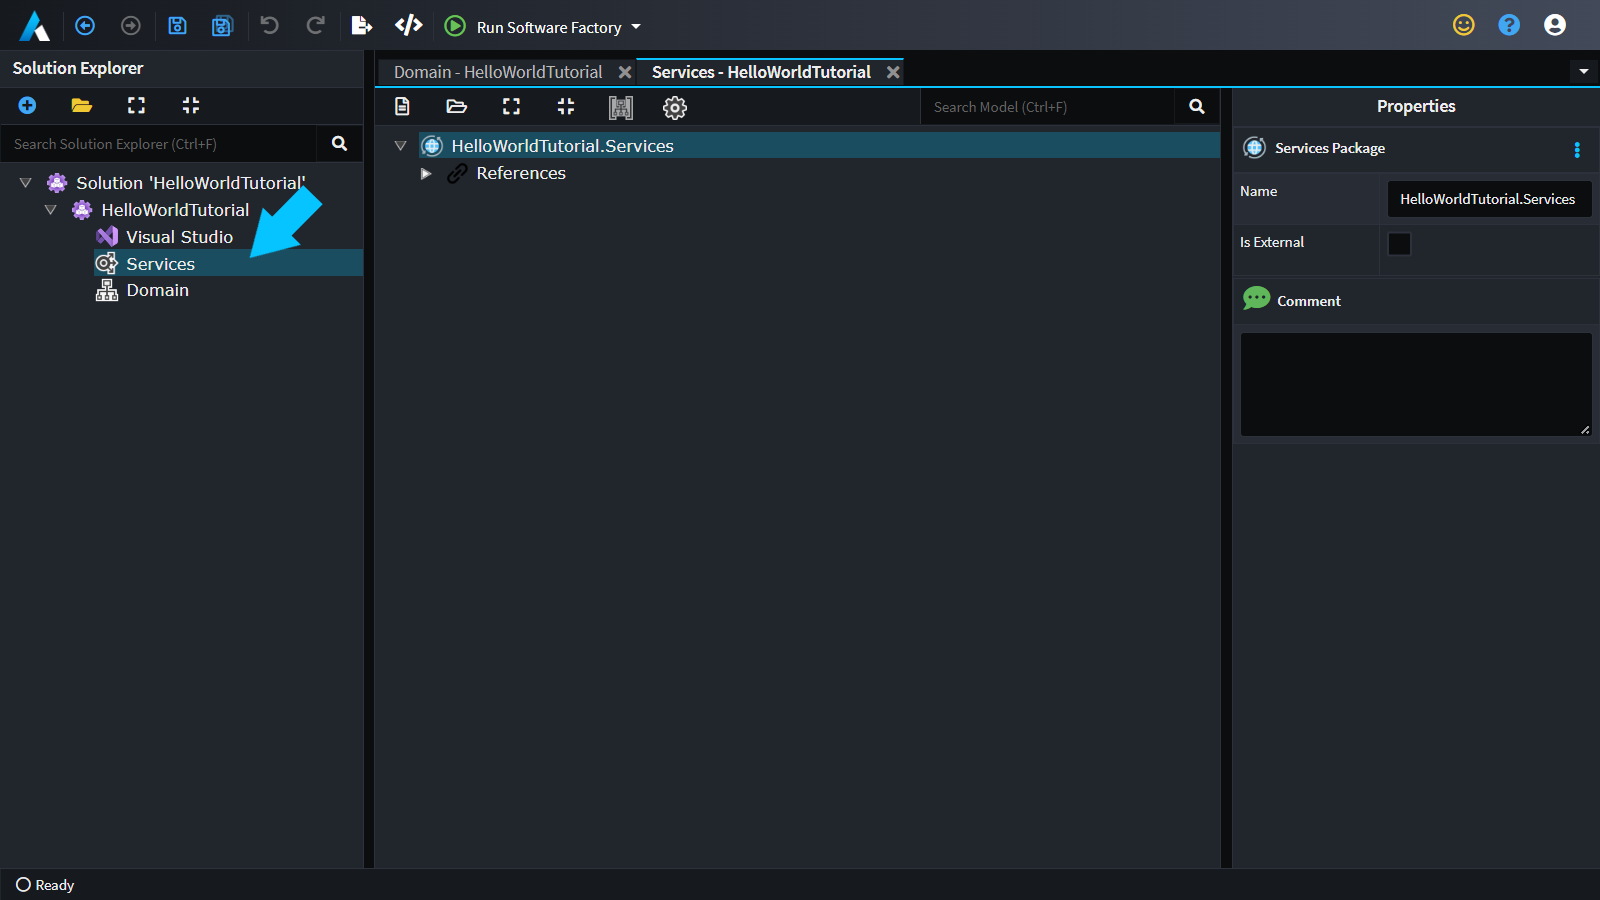
Model your services
In the Services Designer you describe your application services, which is the contract for how your application can be interacted with. This Designer also allows you to define which services are remotely accessible and how they are exposed.
- Open the
ServicesDesigner.
Lets create a service for your Planet entity.
- Right-click anywhere on the grid, and select
Create CRUD CQRS Operations. - In the dialog window
- Select
Planetfrom theEntity for CRUD operationsdropdown. - Click
Done.
- Select
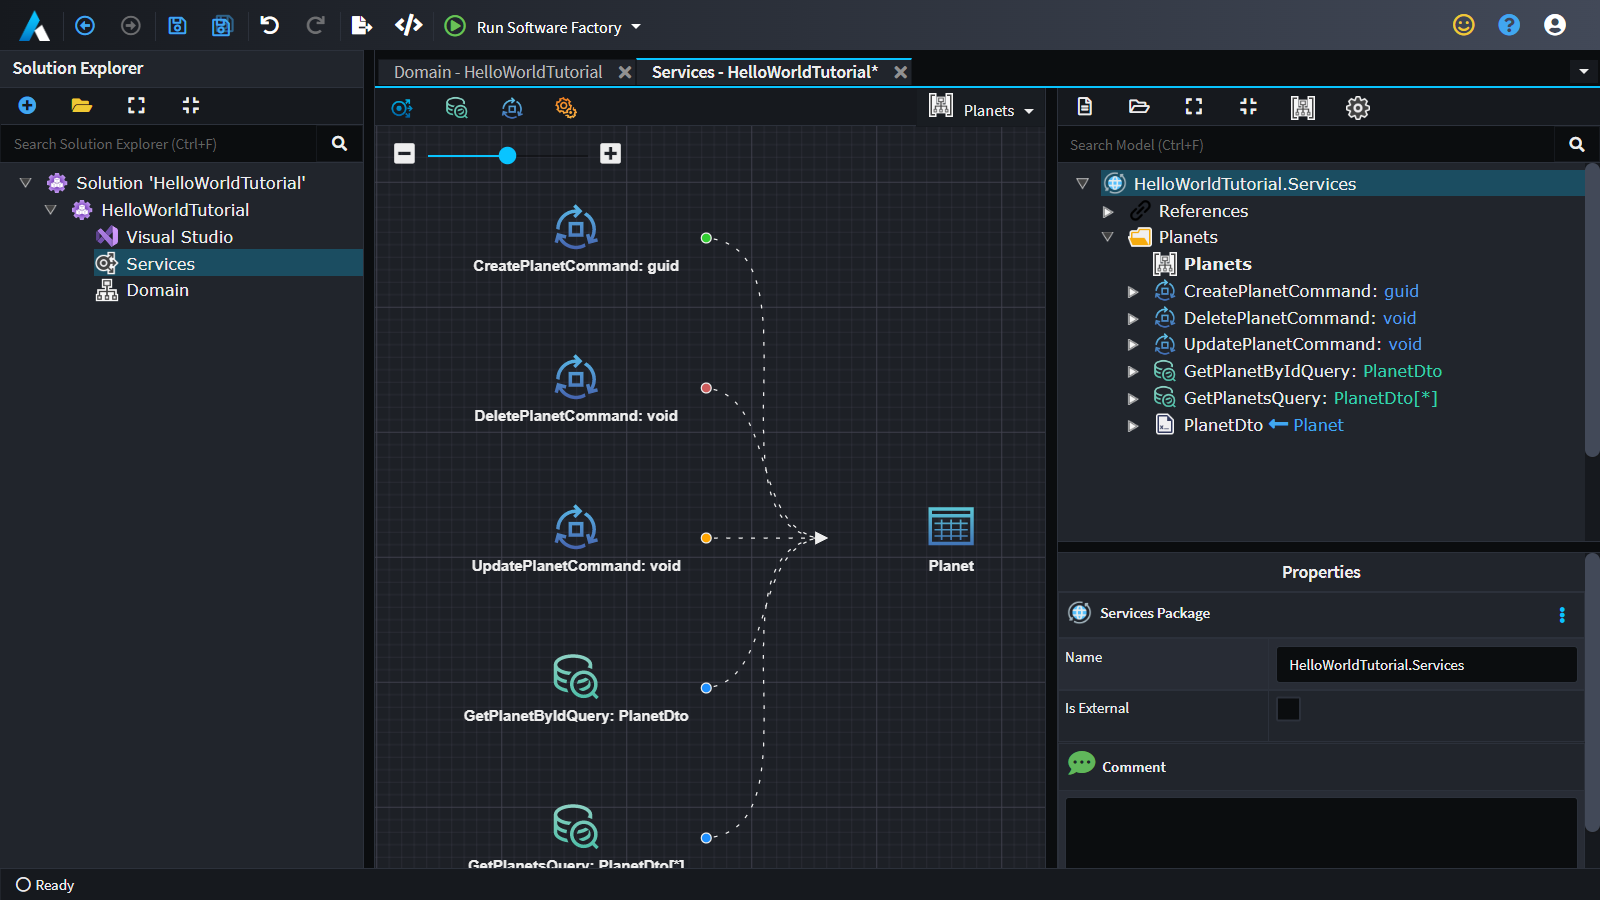
Intent Architect has created a minimalist CQRS style service for you with basic CRUD operations for your Planet entity.
Note
The ASP.NET Core - Clean Architecture template has installed an optional CRUD feature, which is what you used to quickly create service definitions and it will create default convention-based service implementations for you. This is a feature which can be used as is, embraced and extended or skipped all together.
These service operations are currently only available within the application, your next step will be to expose these operations as a RESTful API.
In the tree-view on the right-hand side:
- Click on
CreatePlanetCommand. - Hold down
Shift. - Click on
GetPlanetsQuery. - You should have all the
Commands andQuerys highlighted. - Right-click on any of the highlighted items and select
Expose as Http Endpoint. - Save the Services (
ctrl+s).
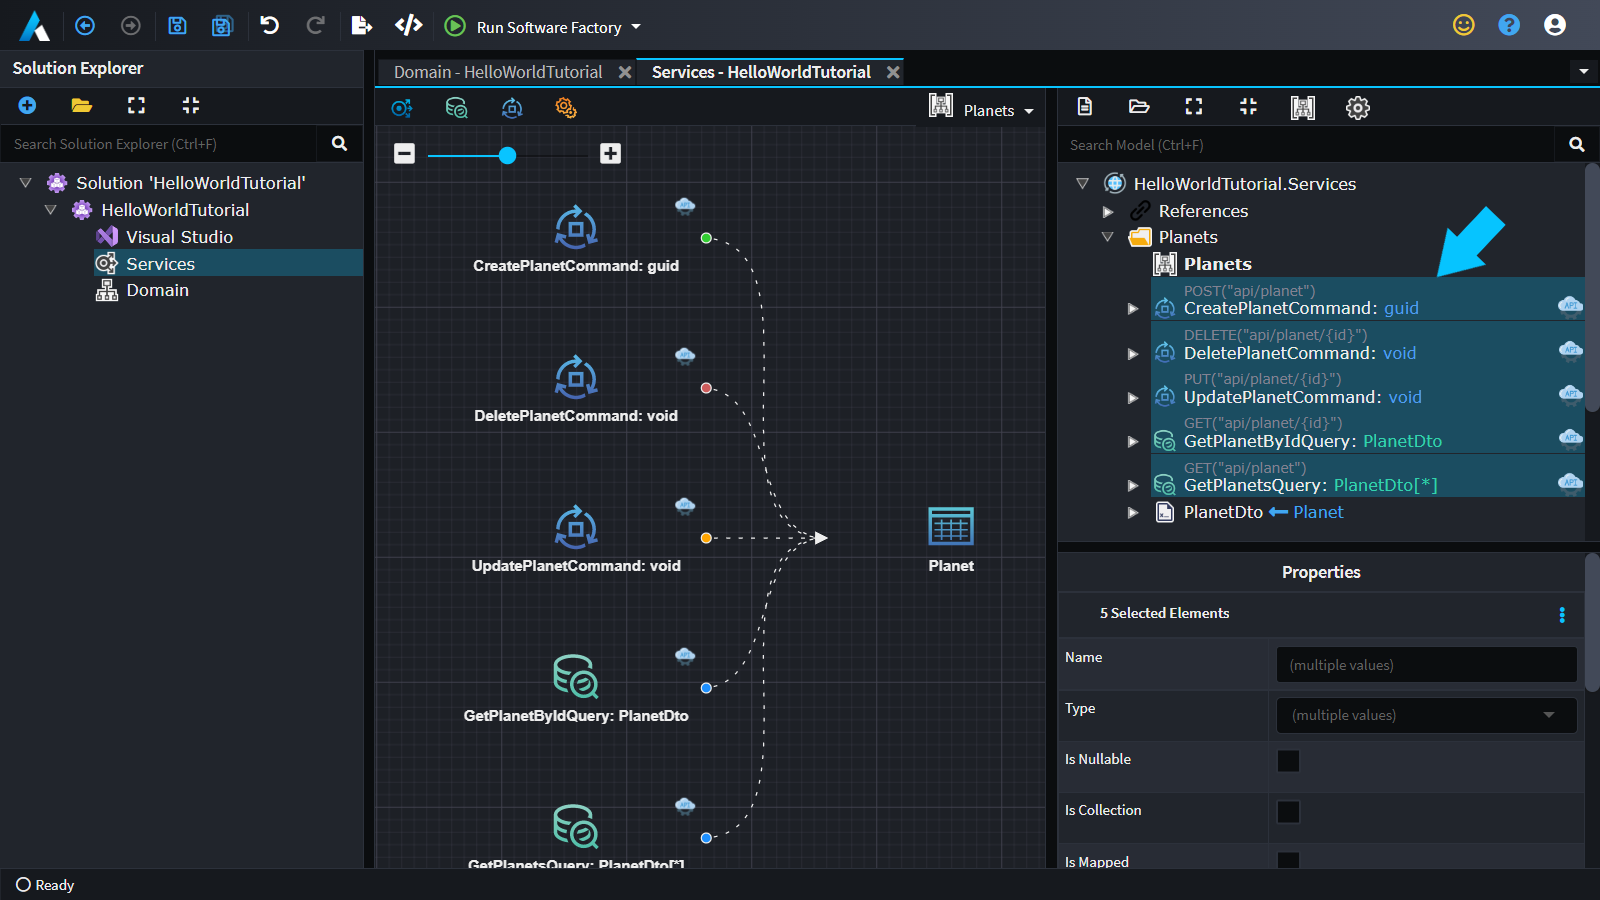
All the Commands and Querys should now be decorated with REST verbs and routes.
That's designing done, and now you are going to have Intent Architect realize this design as source code.
Integrate your design into your codebase
In Intent Architect there is a process called the Software Factory, this process is responsible for:
- Materializing your design as code
- Integrating that code into you codebase
So, lets see it in action.
- Click
Run Software Factory(or pressF5).
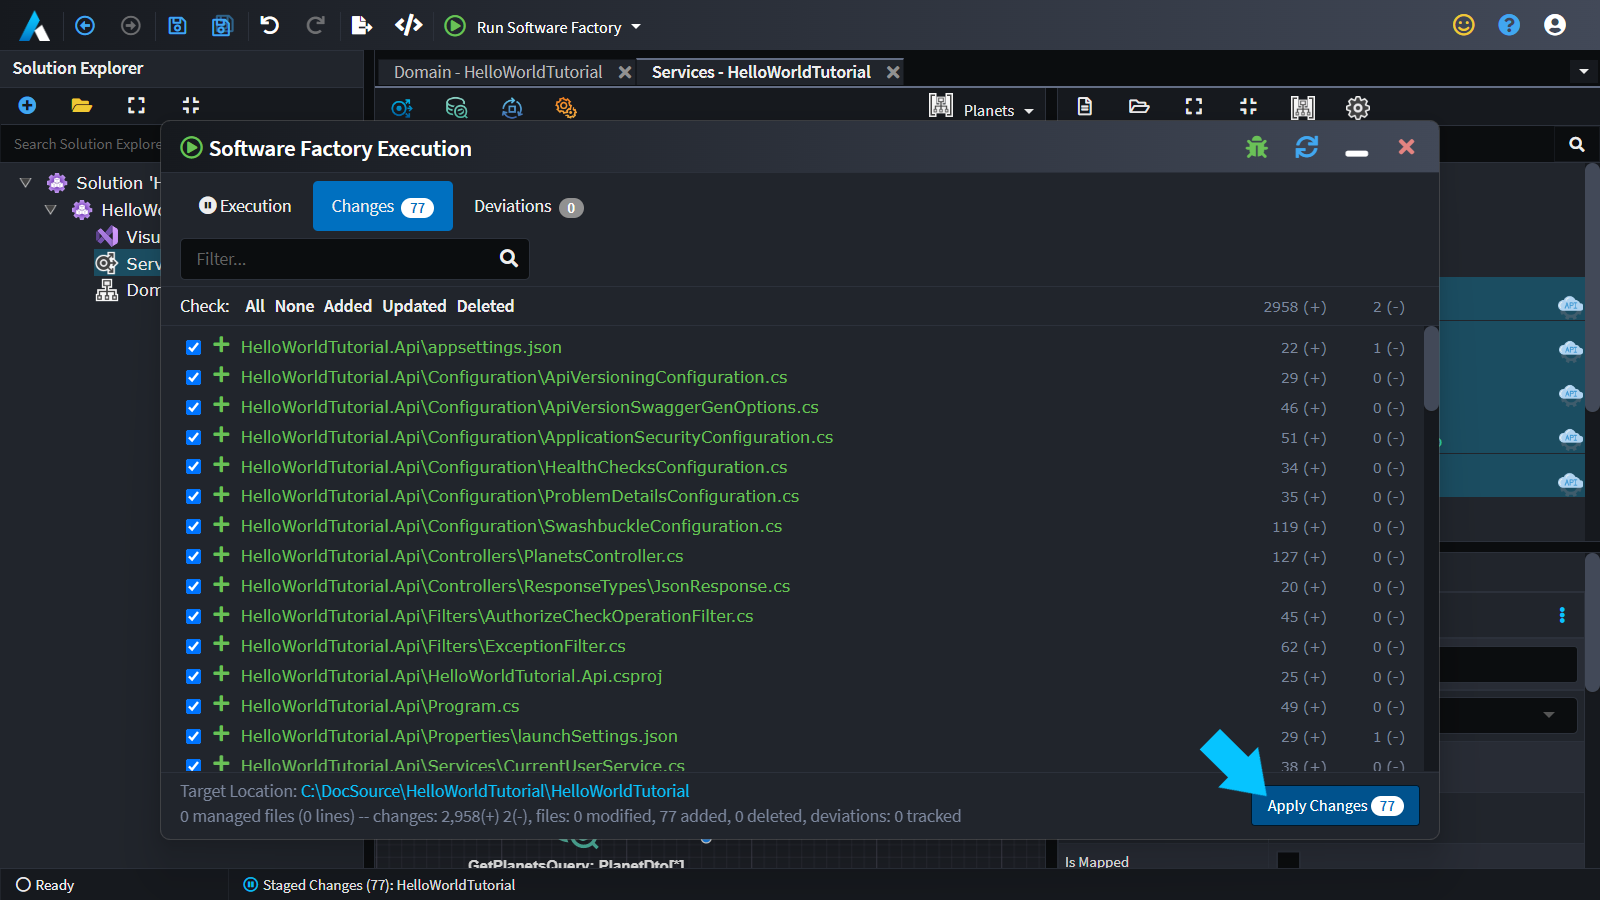
This dialog is presenting you a view of what Intent Architect wants to change in your codebase, giving you an opportunity to review it.
- Click
Apply Changes.
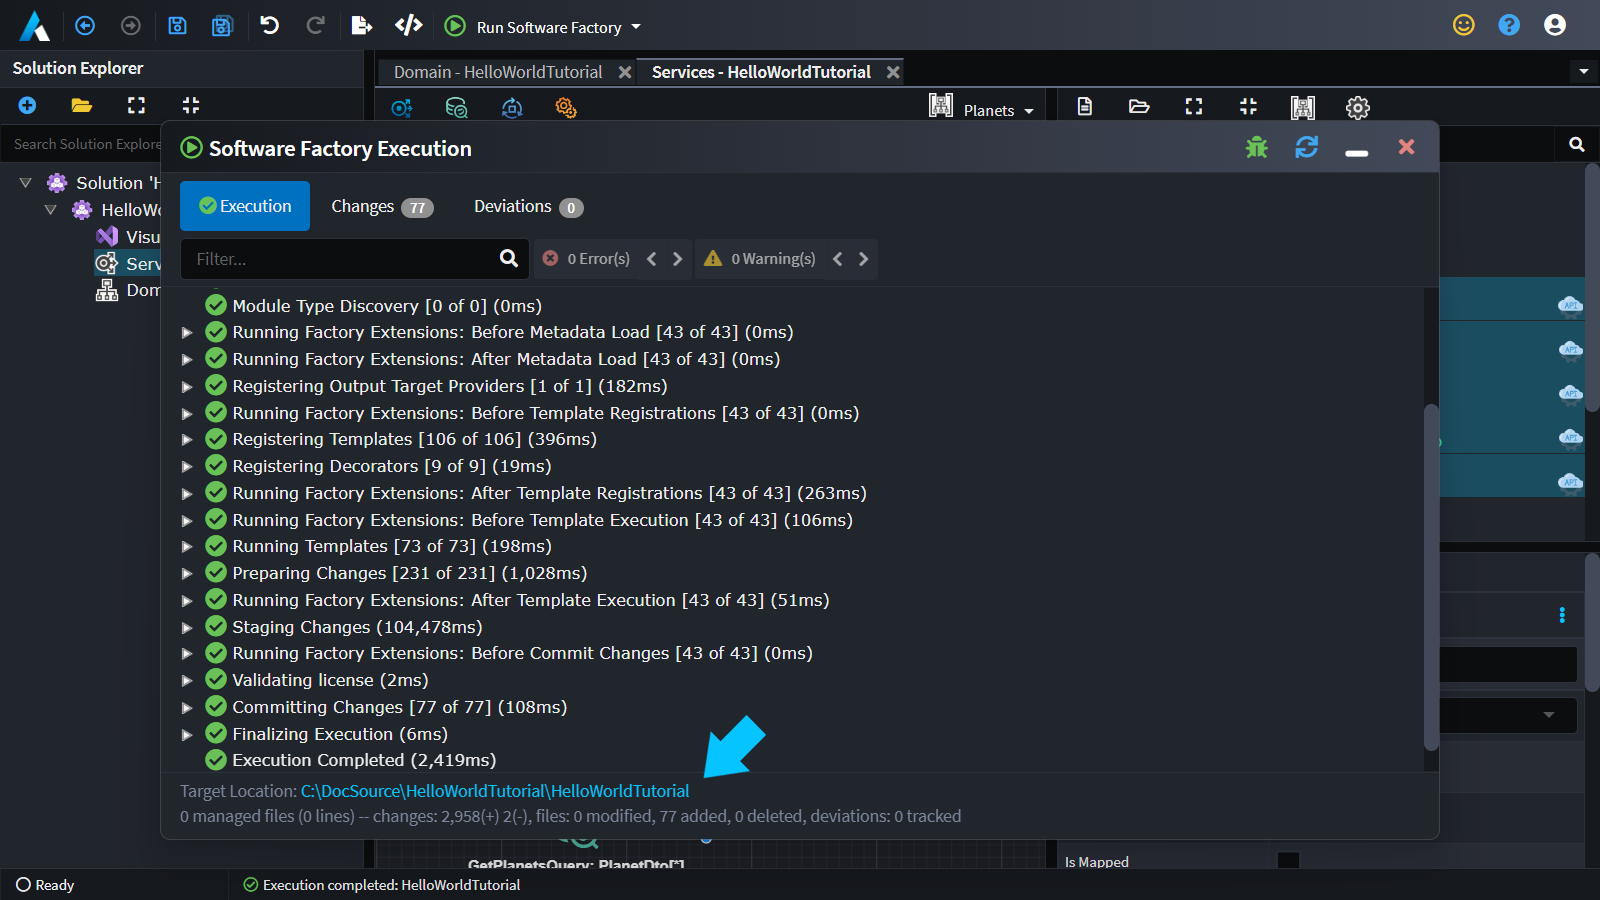
At this point Intent Architect has generated all the code to fulfill your design.
- Click on the blue hyperlink at the bottom left of the Software Factory dialog.
- This will open a folder containing all the generated source code.
Note
Because there wasn't an existing codebase Intent Architect has scaffolded the entire solution. Intent Architect is not merely a scaffolding tool, it is a continuous codebase integration tool, i.e. as you make incremental design changes in Intent Architect it is able to integrate these changes back into the existing codebase on a continuous basis.
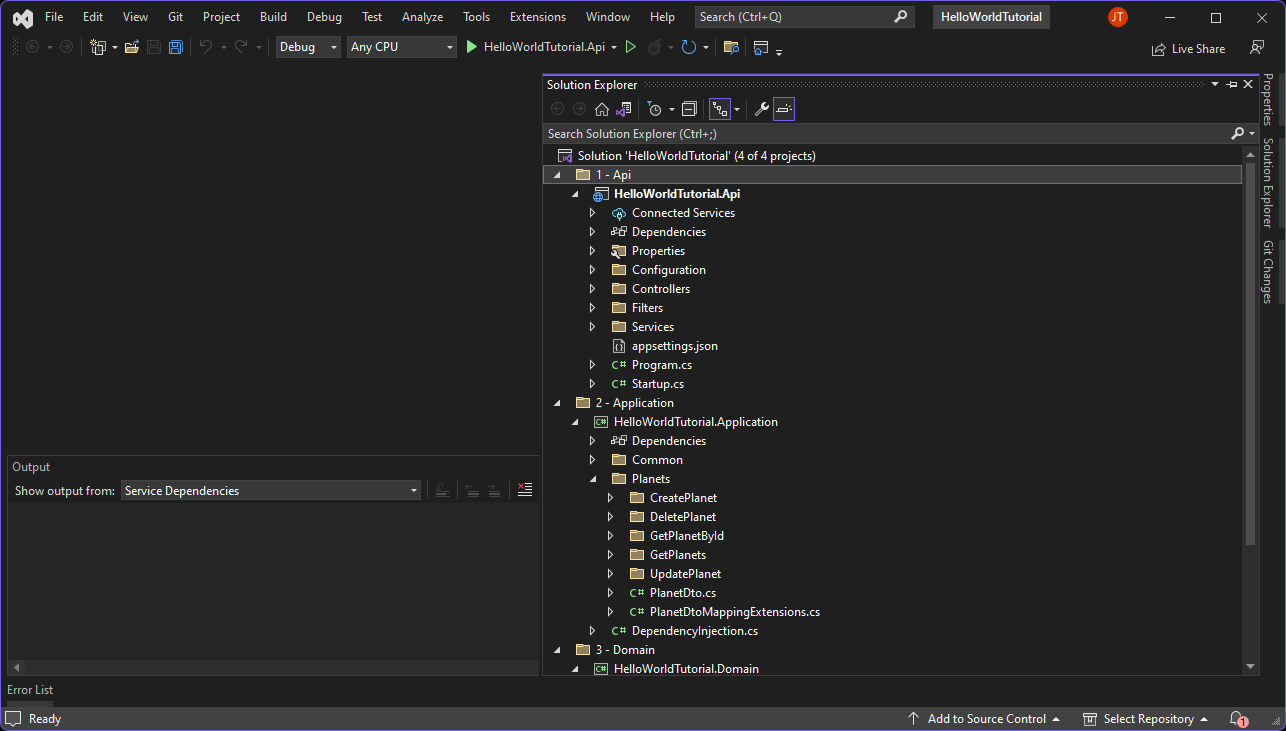
Now you can open up the solution in your C# IDE.
- Open the
.slnfile.
Tip
If you are curious about the architecture of this solution, check out our Intent Architect Webinar on Clean Architecture in .NET.
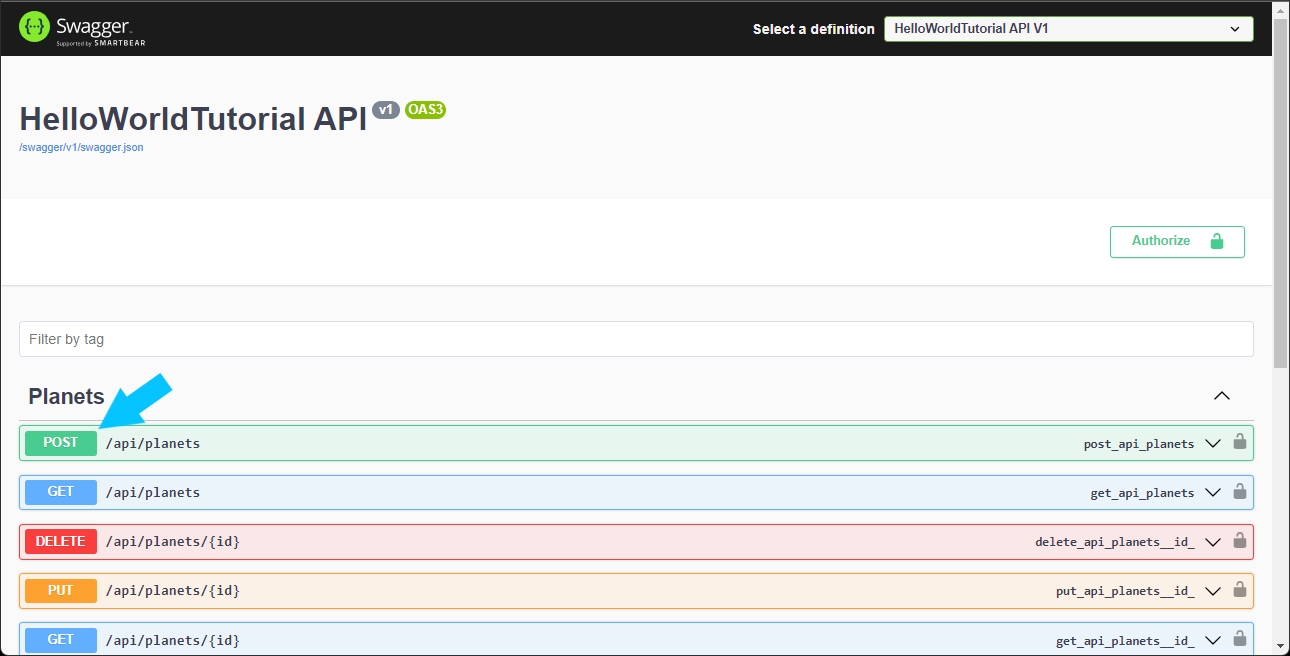
Run the application
Run the application in your IDE and you should be presented with a Swagger based UI which you can use to interact with the application.
In the UI you can see the 5 service operations you modeled earlier and you are now able to invoke them
Time to create your first Planet.
- Click on the
Postoperation. - Click on
Try it out, right hand side of screen. - Update the
nameproperty in the Request body tohello world.
{
  "name": "hello world"
}
- Click the big blue
Executebutton.
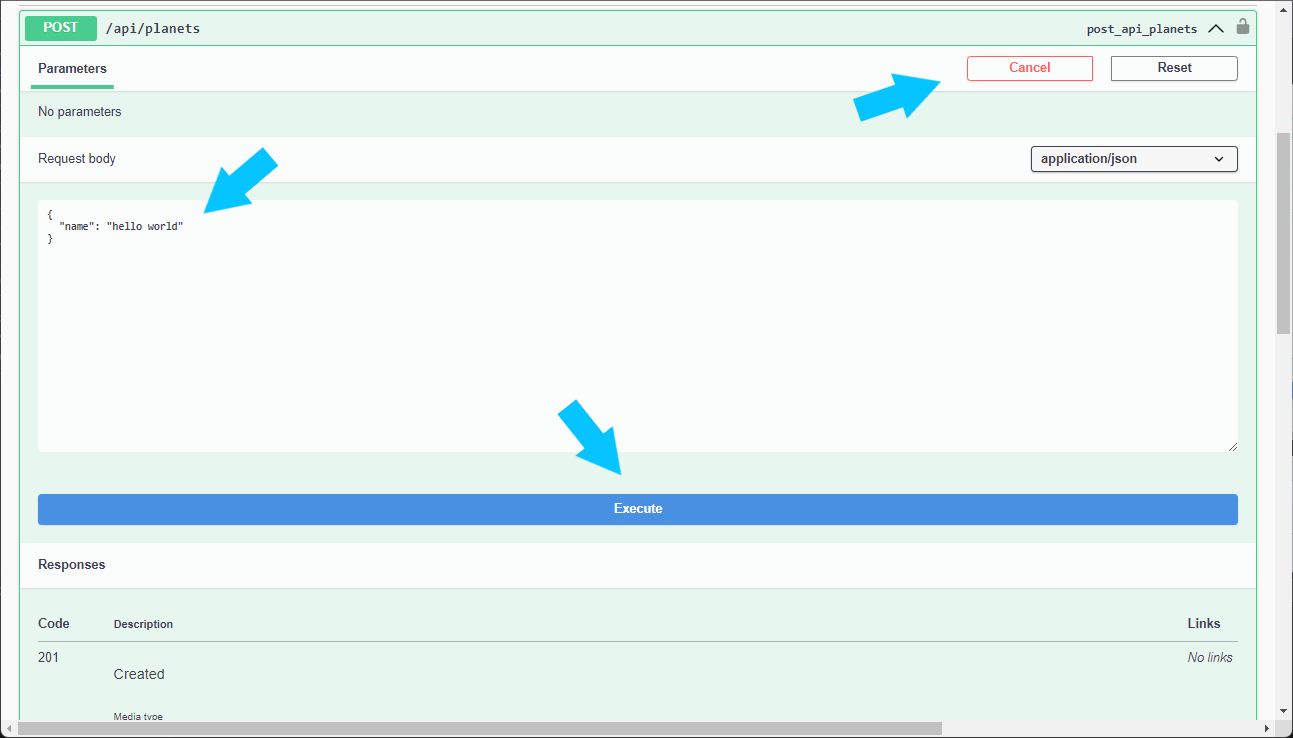
If you scroll down a little you should see a Server Response with a code of 201 and in the response body there will be a guid which is the Id of your newly created Planet entity.
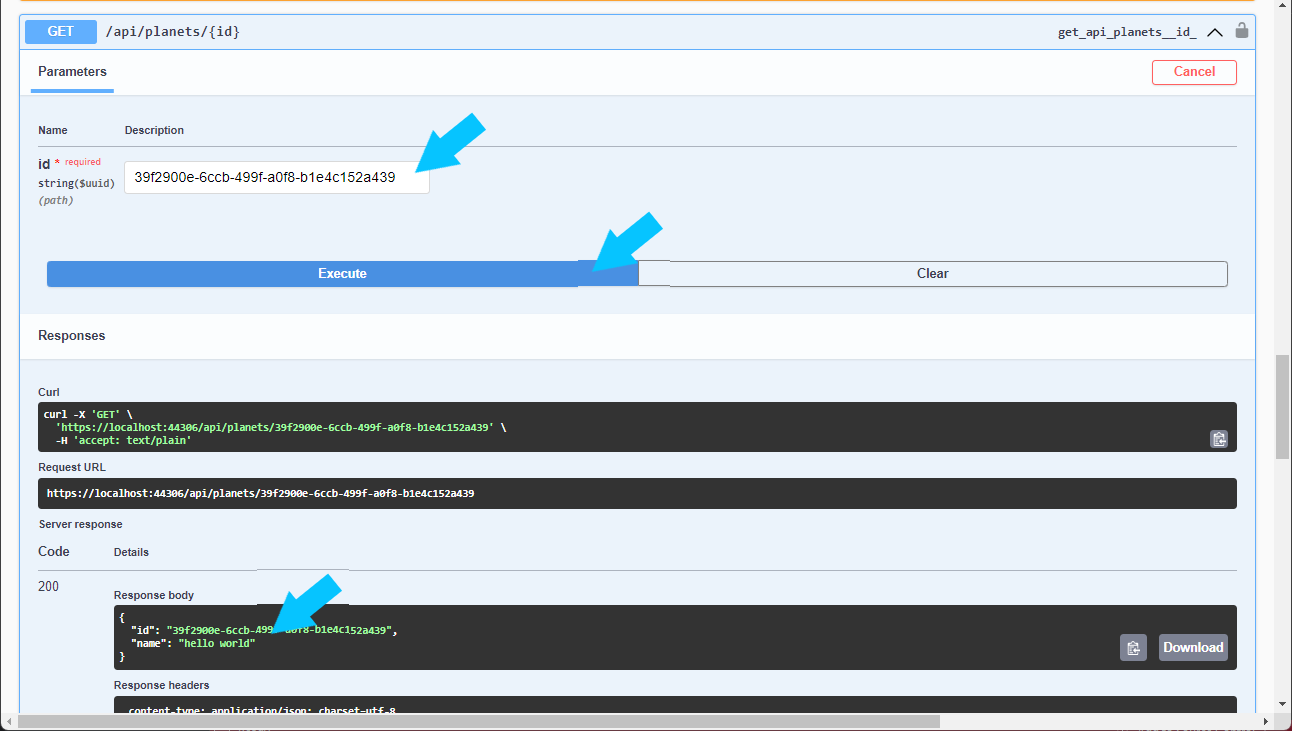
If you'd like to verify this:
- Copy to
Planetid. - Click on the
GEToperation, with route/api/planets/{id}. - Click on
Try it out, right hand side of screen. - Paste the
Planetid in theidtext-box. - Click the big blue
Executebutton.
You should get a response similar to this:
{
  "id": "cf40c444-7dc6-462e-b9c1-5c9e4b8719f7",
  "name": "hello world"
}
Congratulations! You have successfully built your first application using Intent Architect.
At this point you should have some sense of what Intent Architect can do:
- Rapidly build applications.
- Configure your application architecture.
- Visually design your application and domain through modeling.
- Achieve better architectural adherence and consistency through automation.
Next steps
The next tutorial will take you step by step through building a simplified version of the Microsoft eShopOnContainers technology example.
Tutorial 2: Build an Application