How to create Application Templates
This how-to guide will walk you through creating your own Application Template using the Intent Application Template Builder Designer.
Create a new Application
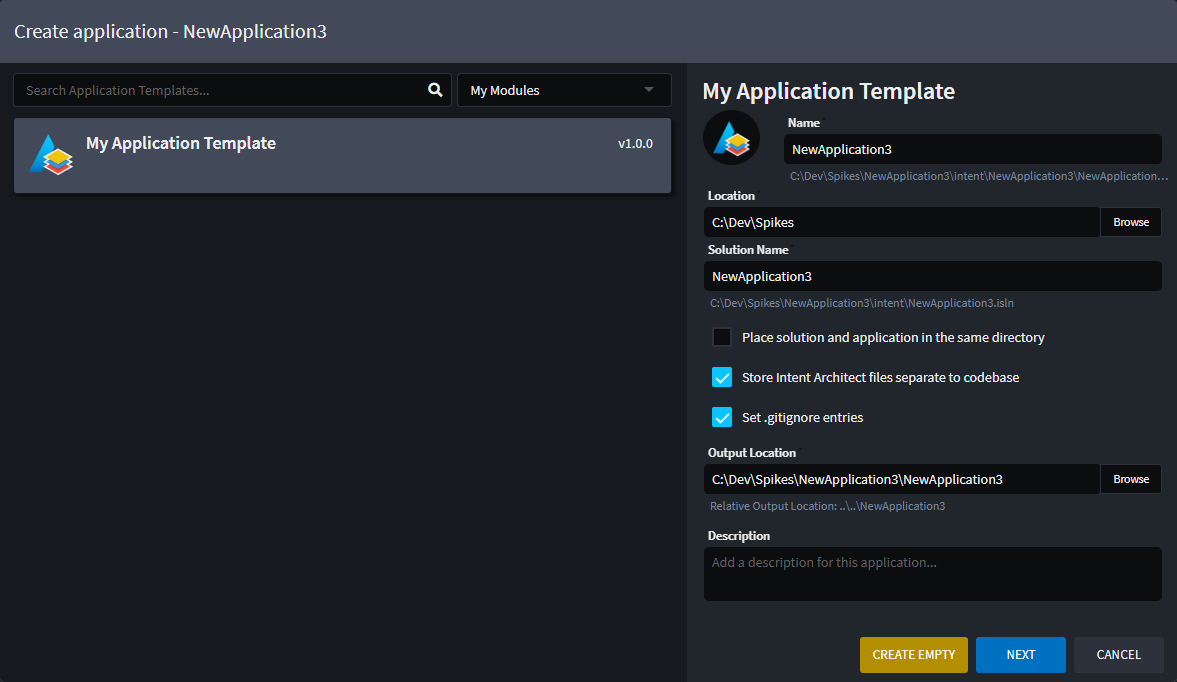
Create a new Intent Application Template Builder application and give it the name MyApplicationTemplates:
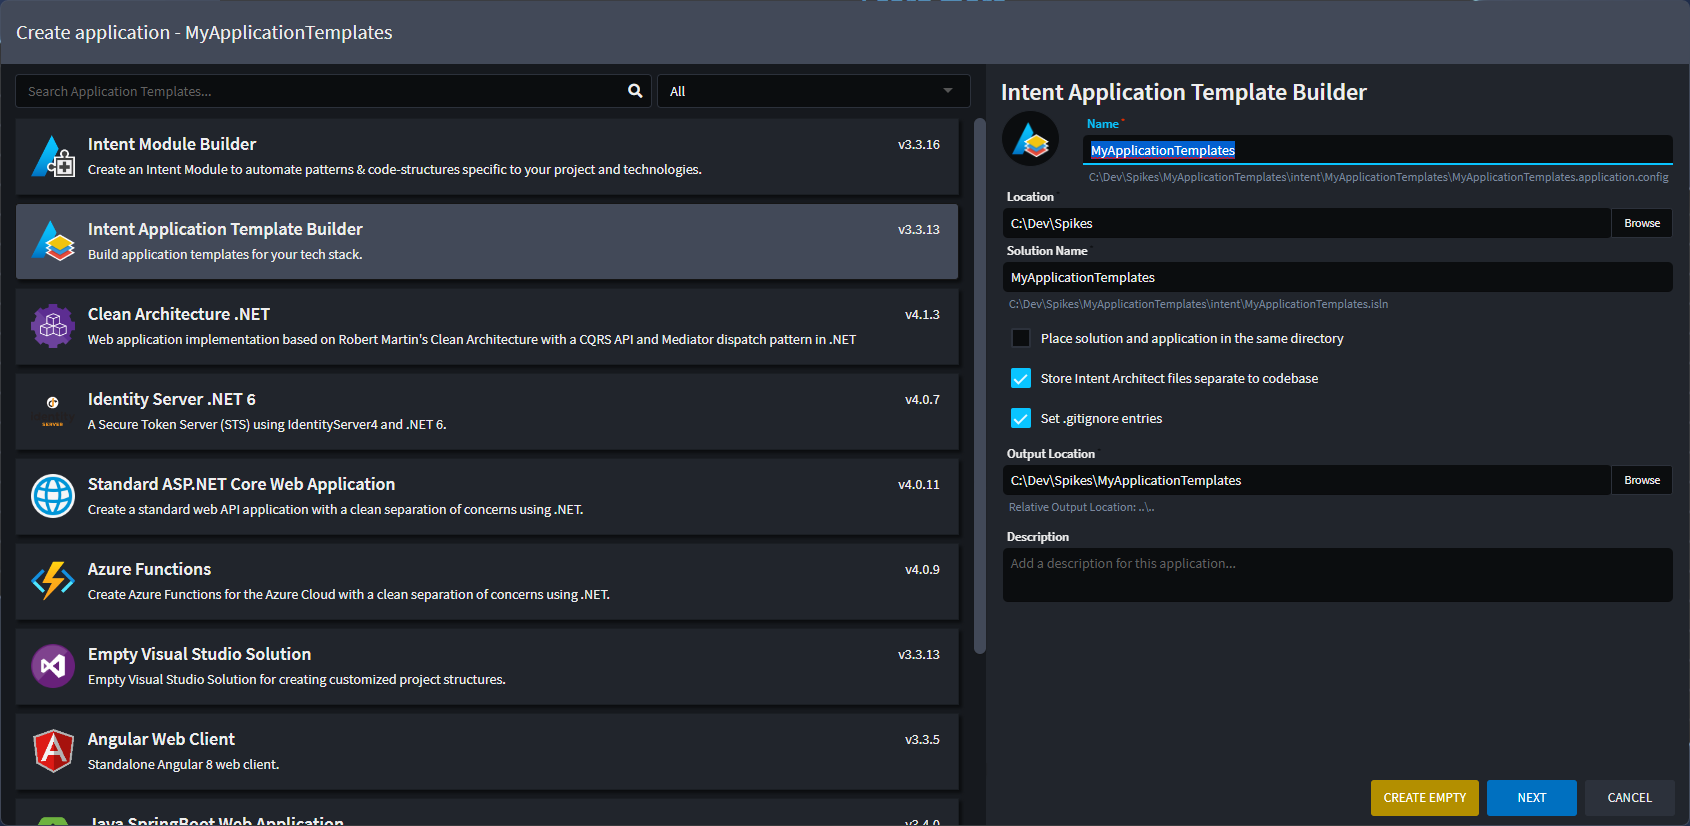
- Click
NEXT. - Leave the ticked options as is and click
CREATE:
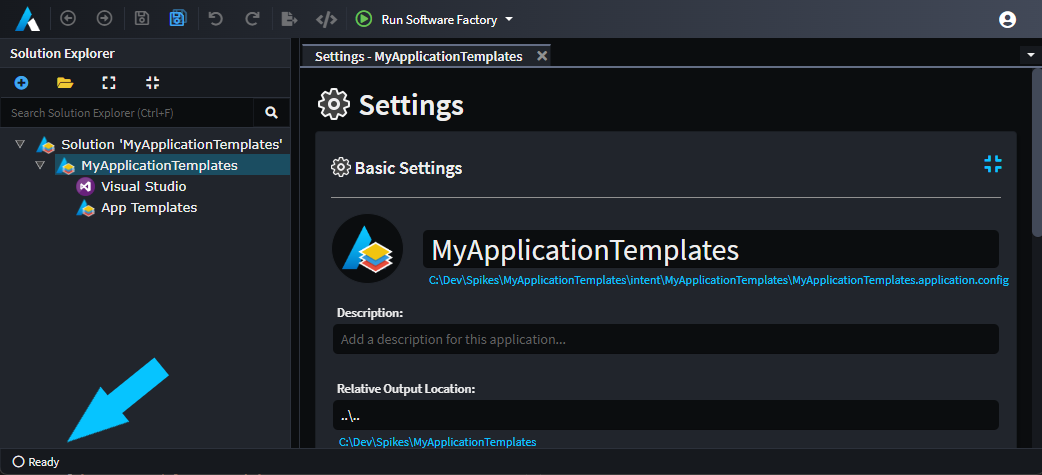
Once the Application Installation is complete, you will see a 'Ready' message.
Create a new Package
- Click on the
App TemplatesDesigner on the left. - Click
CREATE NEW PACKAGE. - Give the package a name of
My Application Template. - Click
DONE. - Click the root Package element and in the Properties pane on the right:
- For
Display NameenterMy Application Template:
- For
Specify a Group and a Component
- Right-click the root Package element and click the
New Groupoption. - Give the new element a name of
Group 1. - Right-click the
Group 1element and click theAdd Componentoption. - Give the new element a name of
Component 1. - Click the root
Component 1element and in the Properties pane on the right:- For
Iconuse the ellipses to choose an icon:
- For
Add a Module
Right-click the
Component 1element and click theAdd Moduleoption.Give the new element a name of
Intent.Modelers.Domain.Important
This must be the exact name of a module which is to be installed by the Application Template.
Click the root
Intent.Modelers.Domainelement and in the Properties pane on the right:For
Versionenter3.4.0.Important
This must be a valid version for the Module name chosen above.

Run the Software Factory to generate the module
Run the Software Factory and optionally review the proposed changes:
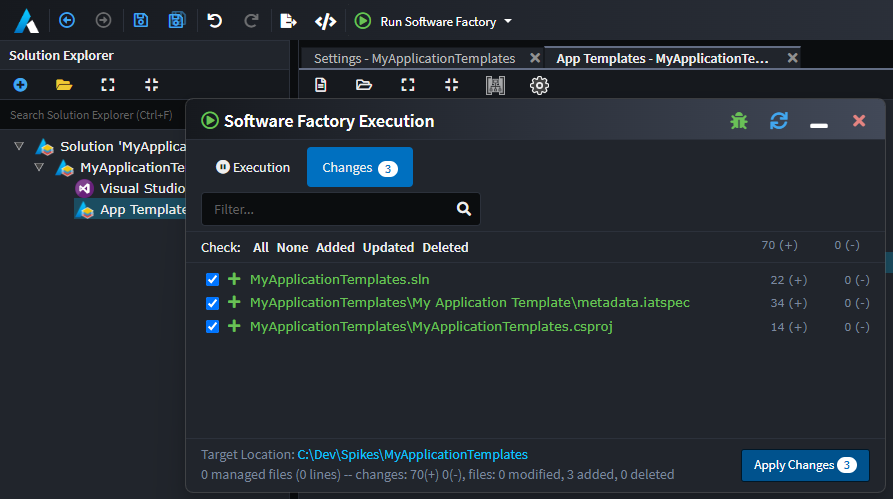
Click APPLY CHANGES.
Before you dismiss the Software Factory Execution dialog (after it's completed applying all the changes) expand the second last item called Finalizing Execution, then Execution Life Cycle to see that a dotnet build was executed on the generated Visual Studio solution:
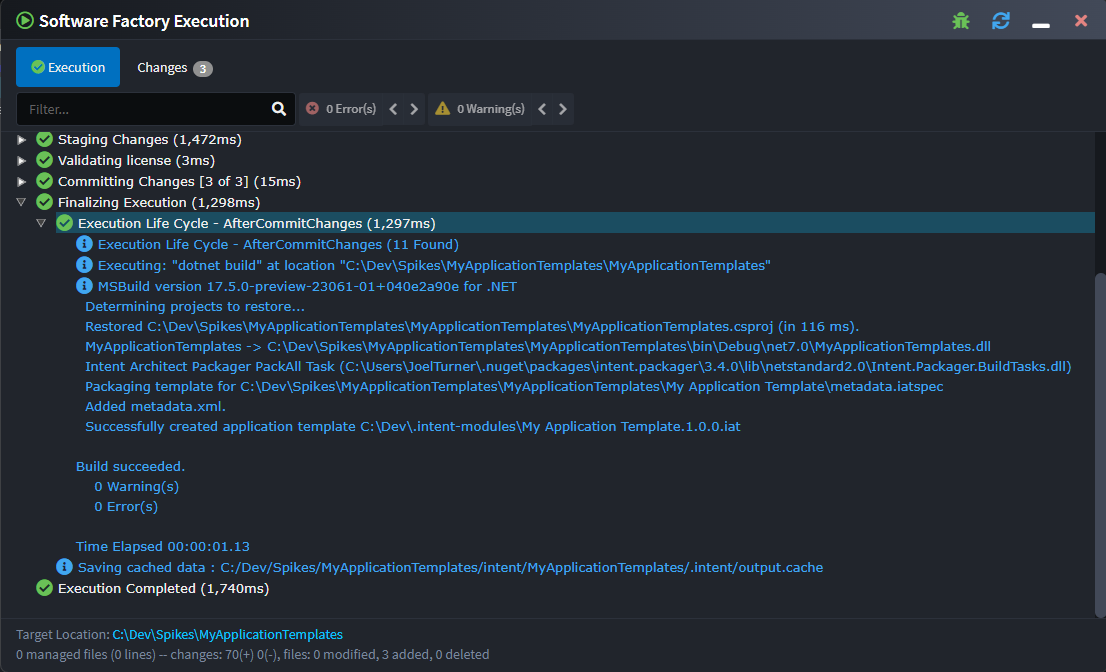
Take note of the following line in the output for the following step:
Successfully created application template C:\Dev\.Intent-modules\My Application Template.1.0.0.iat
Important
This output location may be different depending on your environment configuration.
Click on the close button.
Test your Application Template
Ensure you have added the output path as noted in the above step as a repository in the Repository Manager.
Add a new Asset Repository with the name My Modules and address C:\Dev\.Intent-modules (this is the folder where your .iat file is located), then click Save.

In the Solution Explorer click to add a new application. Ensure your module repository is selected in the drop down and you should see your application template:
Give it a name and click NEXT.
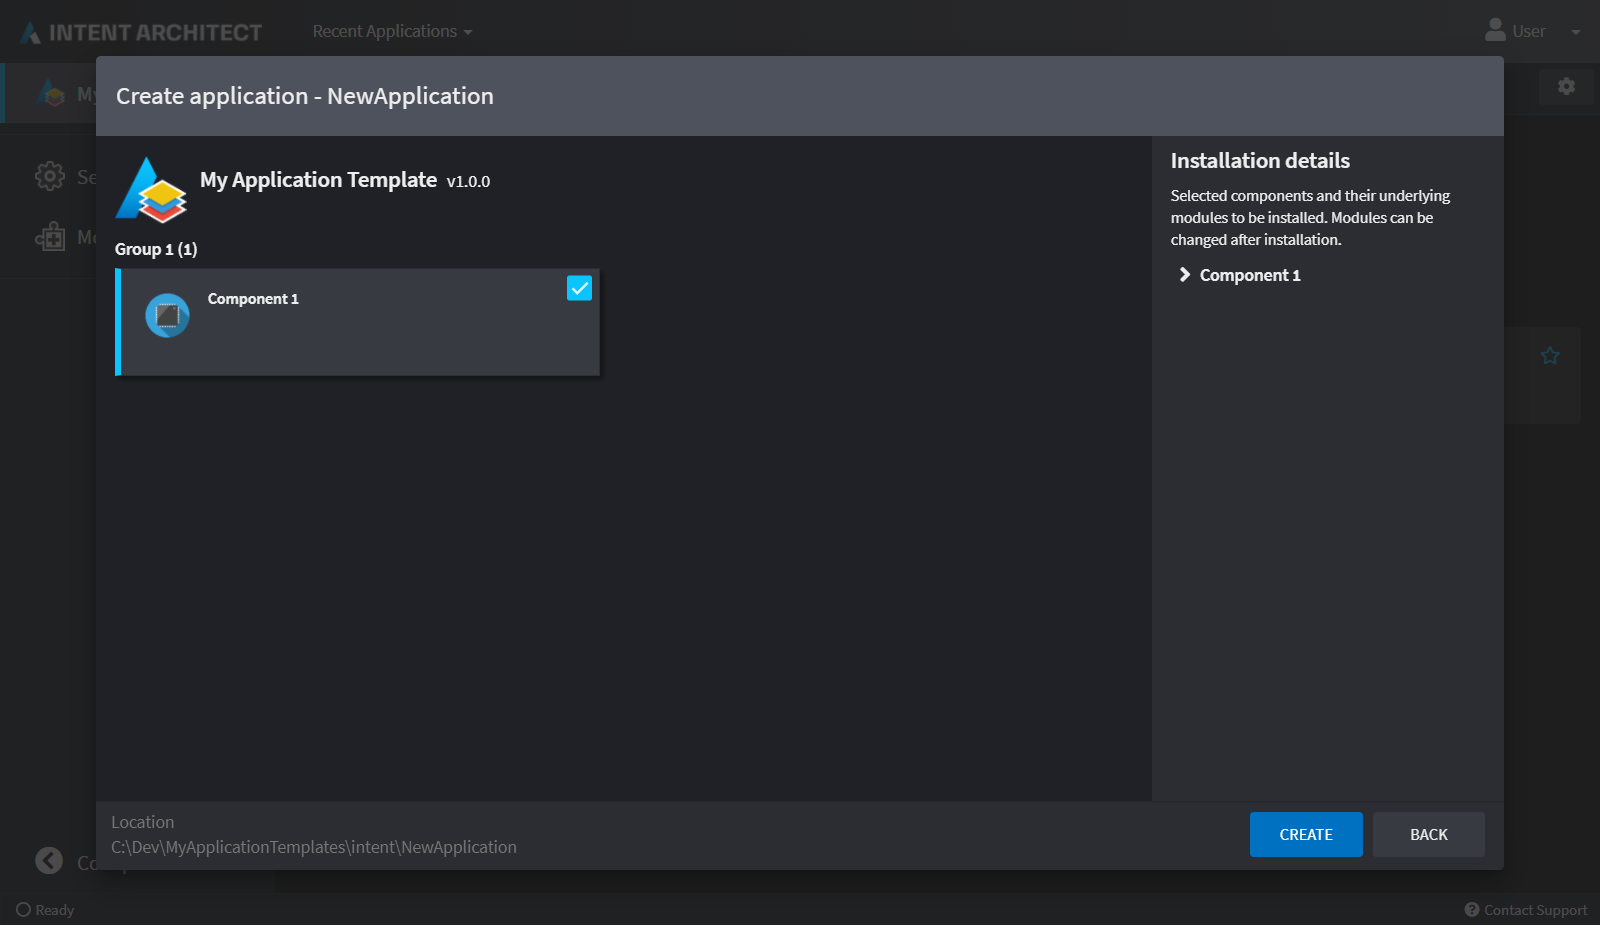
Notice that it's showing all the elements we created in the Specify a Group and a Component and Add a Module steps.
Defining user configurable settings
Application Templates also allow defining of user configurable options, for example in the following screen shot, the contents of the highlighted box is configurable:
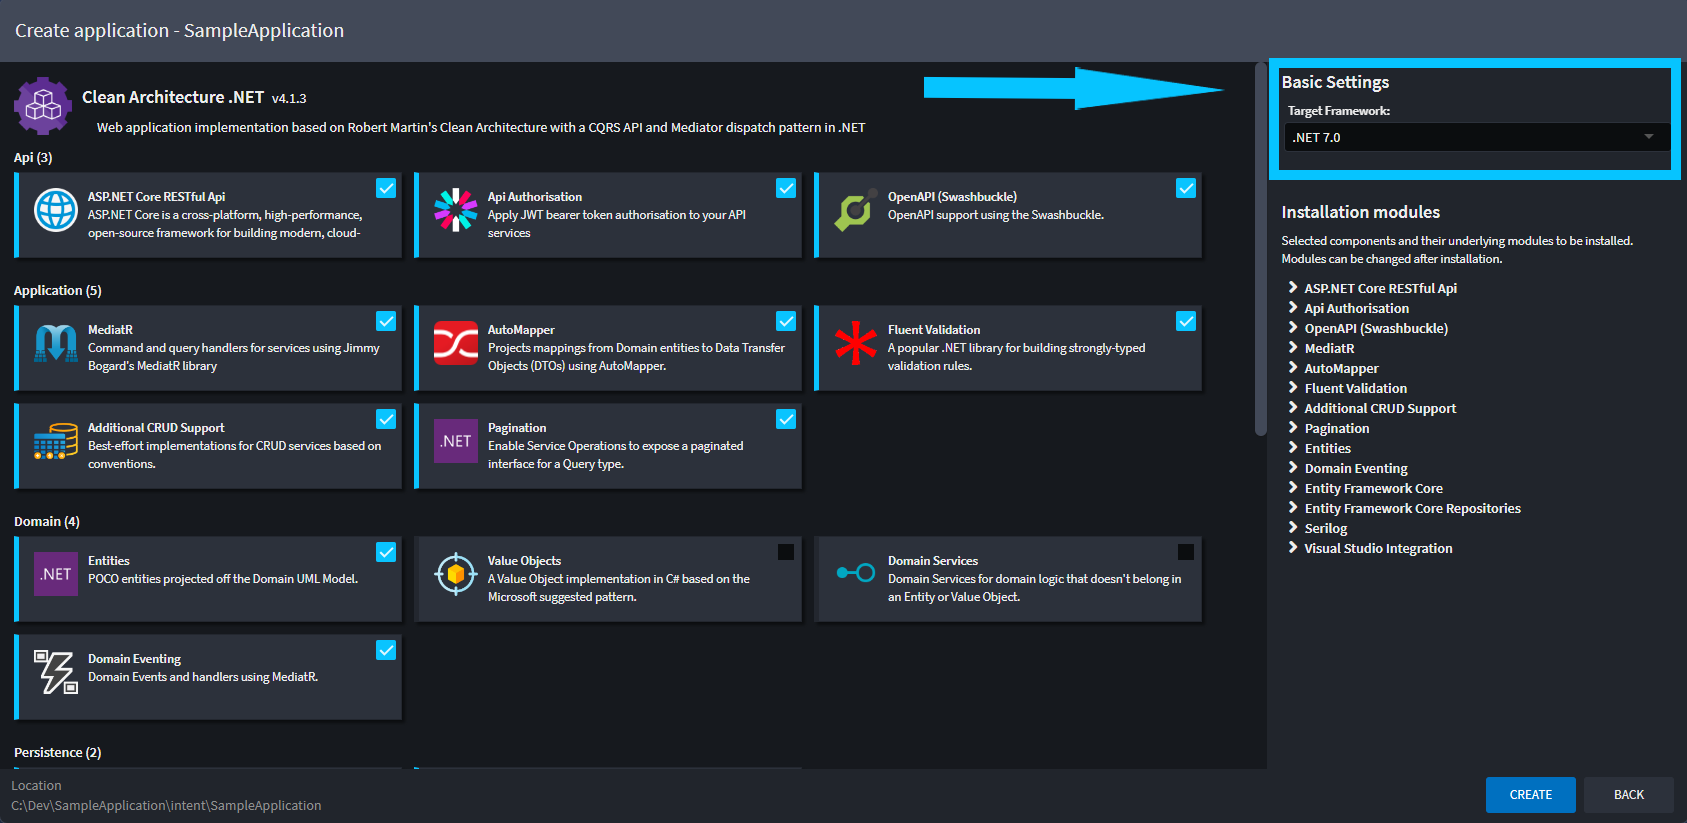
Settings Configurations
In the above screenshot, the Basic Settings is a Settings Configuration which can one or more Fields. An Application Template can have multiple Settings Configurations defined with each one having in a separate "heading" for itself.
To create a Settings Configuration, right-click the Package node in the Application Template Designer and use the New Settings Configuration option.
Note
If you try run the Software Factory to test the updated Application Template you will not see any effect yet as the New Application wizard hides Settings Configurations with no fields or where all fields for it are Hidden.
Field Configurations
Each Settings Configuration can have one or more Field Configurations within it. A Field Configuration's Name is used as the display label presented on the wizard's UI and a Field Configuration's Value setting is the logical setting name that can be referred to for consuming the value of the Field Configuration which was captured by the user in the wizard.
To create a Field Configuration, right-click a Settings Configuration and use the Add Field option.
Control Type
The Control Type property is used to control what kind of control is used in the wizard UI for the field. The following options are available:
Is Required
When set, the wizard UI will not allow the user to proceed unless a value for the Field Configuration has been captured.
Hint
Text which appears below the field which can be used to further explain how the captured value for the Field Configuration should be used or what it is for.
Default Value
Used to set the default value for the Field Configuration.
Field Options
Are presented as available options for Select and Multi-Select Control Types.
A Field Option's Name controls the display name of the Field Option in the UI and the Field Option's Value is used to to define the value that is ultimately consumed when a Field Option is selected.
To create a Field Option, right-click a Field Configuration and use the Add Option option.
Consuming values captured during the wizard
For Metadata .installation.config files
All Field Configuration values are available as template strings for use in .installation.config files. Use a Field Configuration's Value using the ${<value>} format and it will be substituted with the user captured (or otherwise default) value. For example, for a Field Configuration with a Name of Custom Field and a Value of custom-field:
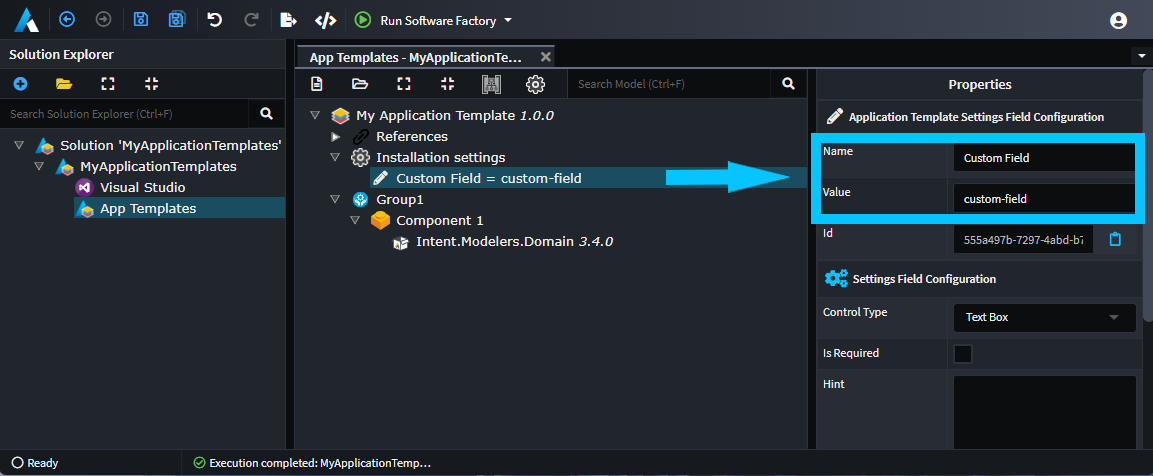
You would use ${custom-field} in .installation.config files to have the user captured value substituted.
For Module Settings
Application Templates can set initial Module Setting field values with values from Field Configurations.
The Field Configuration's value as configured in the Application Template builder will need to match the id of the Module Setting's field.
A quick way of finding this id is to install the Module in an Application and then look at the Application's .application.config file to find the field with its id.
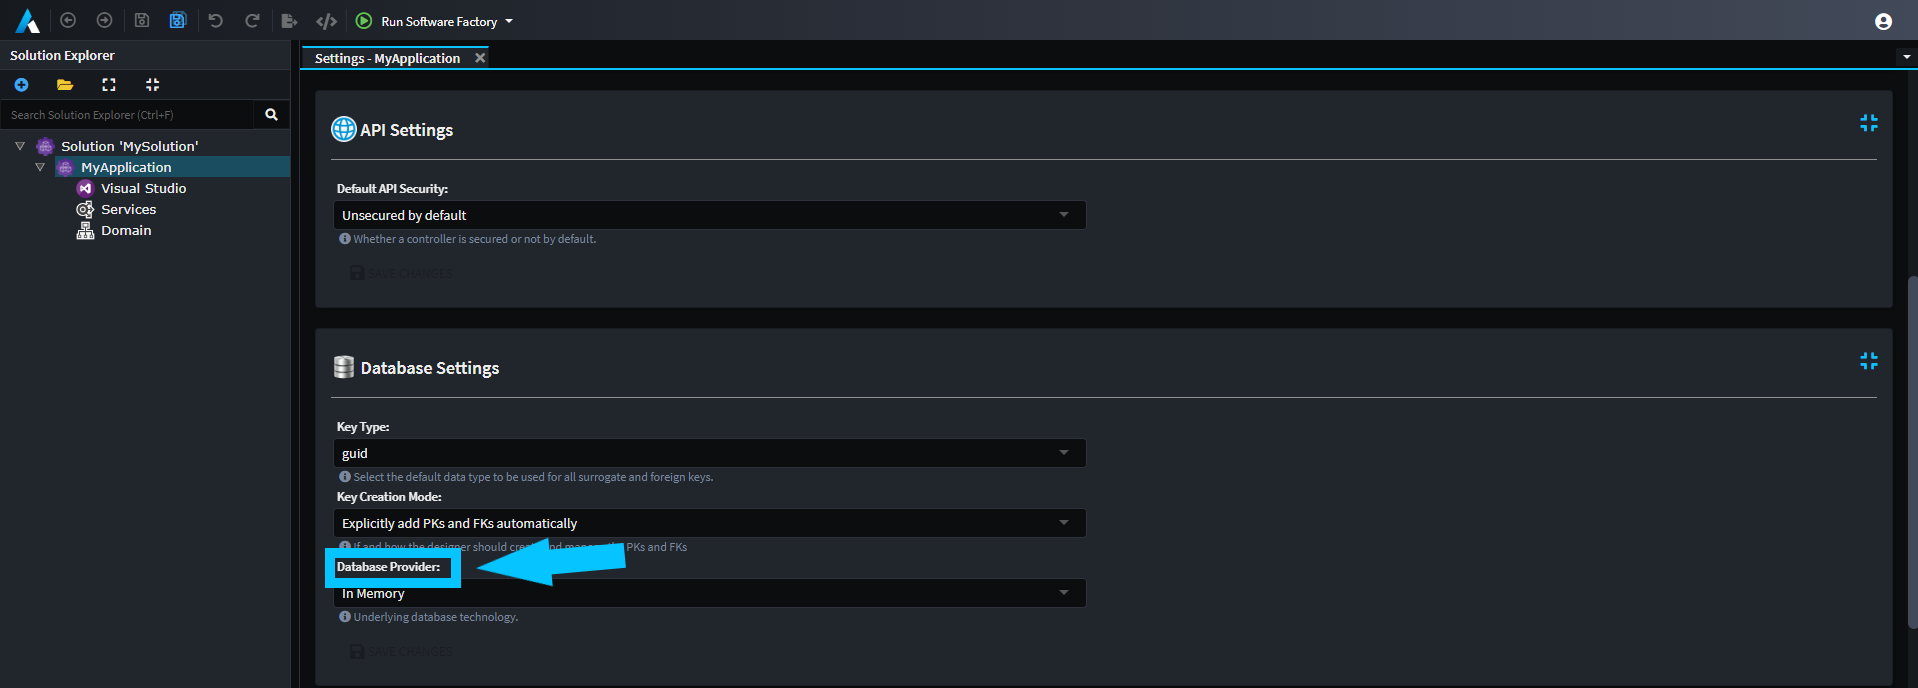
An Application's .application.config file path can be located on the Settings screen and the path can be clicked on to have the file revealed in your OS's file system browser:

Make note of the Module Setting Field's label from Settings screen to be able to search for it in the .application.config file, for example if we want to set the value for Database Provider field, we make note of the label being that name:
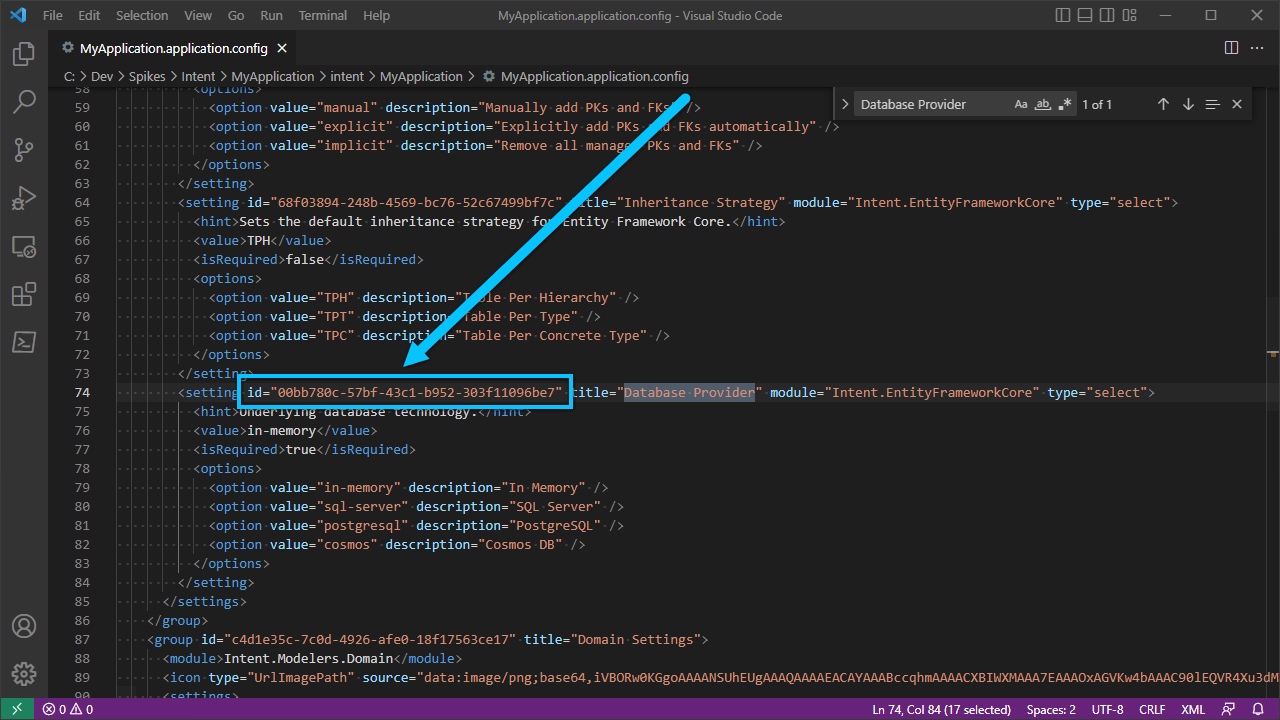
Then search for the text of the label in the .application.config file and on the same element is the id attribute with the value that we need:
We then use the id value as the Value for the Field Configuration:
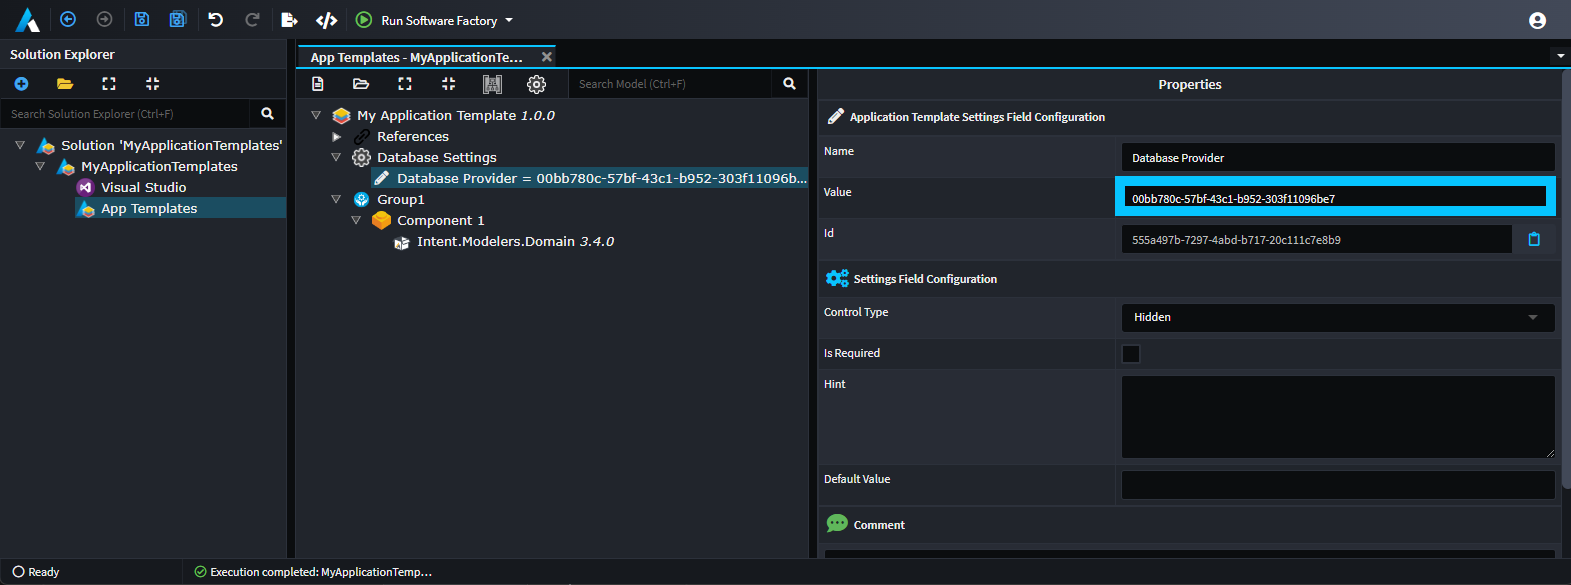
Because Module Settings can still be changed after using the Application Template wizard, it's common to simply give these fields a default value and set their Control Type to Hidden:

Next steps
You can use the App Templates Designer to add/change Groups, Components, Modules and Settings Configuration, re-run the Software Factory and see the affect it has on your Application Template when used in Intent Architect.
Using the metadata installation system, new applications created with your template can have default metadata installed, for example you could have the Visual Studio designer on the new application pre-configured with your desired solution and project layout.