Install and run the Module
When creating Modules it is often very useful to have a test Application that we can use to test that our Modules are working correctly. This tutorial explains how to create this test Application and how to install and run the Module we created in the previous tutorial.
Create an empty Application
Note
If you have already created an Application to install your module in, you can skip this section and jump straight to the Install the Module section.
To get started, let's create an empty Application.
Tip
This article will assume you're running only a single instance of Intent Architect, but you can also start a new instance in which you open the new application, this is convenient when you find yourself regularly switching back and forth between the Modules Solution and the Test Application.
- From the home view, click
Create a new application. - Set the Application's name, location, and Solution name. NOTE: You can ignore which Application Template is selected. It won't affect an empty application.
- Click
CREATE EMPTYNOTE: WithCREATE EMPTYthe selected application template is ignored. - When prompted with a confirmation, click
YESto continue.
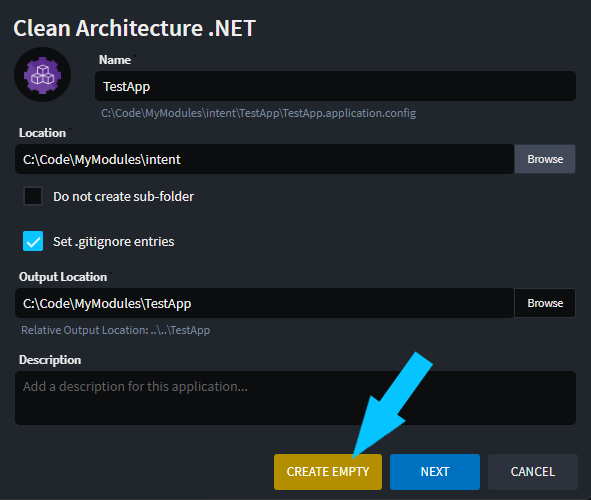
Note
We typically create Applications with an Application Template. Empty Applications are useful when there aren't any Application Templates that fulfill your needs.
Set up Visual Studio projects
Applications need a way to know where to output specific code files. Since we're working with .NET we can install the Intent.VisualStudio.Projects Module which installs a Designer to configure our .NET solution and project structure.
To install this module we must navigate to the Modules tab within our application.
Search for the
Intent.VisualStudio.ProjectsModule by typing "visual" into the filter.Select the Module.
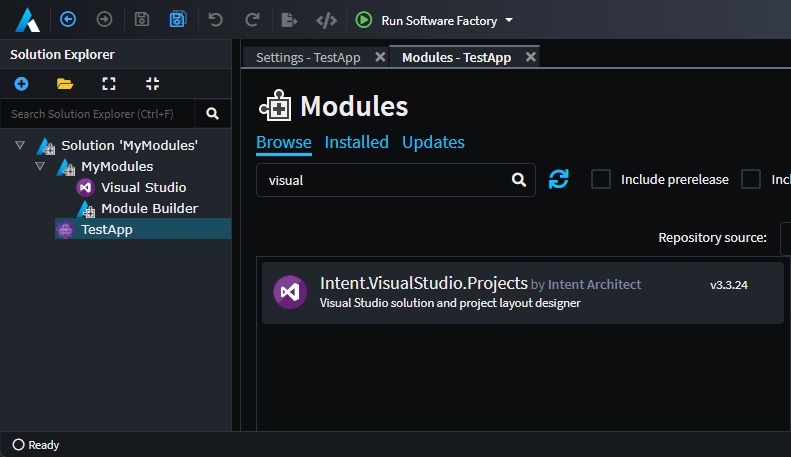
In the details pane, click
Installto install the latest version.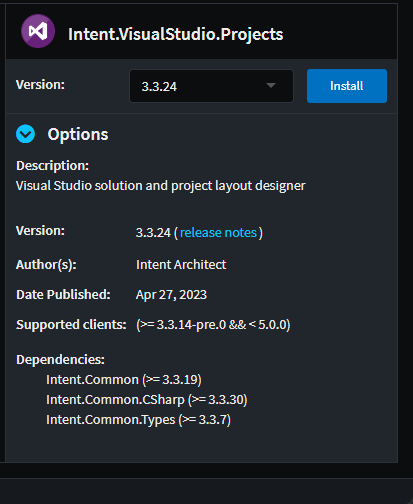
You may have noticed that a new Visual Studio Designer was installed into our Application. It will allow us to structure the C# projects in our codebase. For this tutorial, we can set up a typical web application project structure that separates Domain, Infrastructure, and API concerns.
Click on the
Visual StudioDesignerCreate a new
Visual Studio Solutionpackage by clicking on theCREATE NEW PACKAGEbutton.Fill in the name of the Visual Studio solution, then click
DONE.Next, create a project by right-clicking on the new Visual Studio Solution package and selecting the project type. We will create a
C# Project (.NET)project nameTestProjectin this tutorial.The application structure should look as follows:
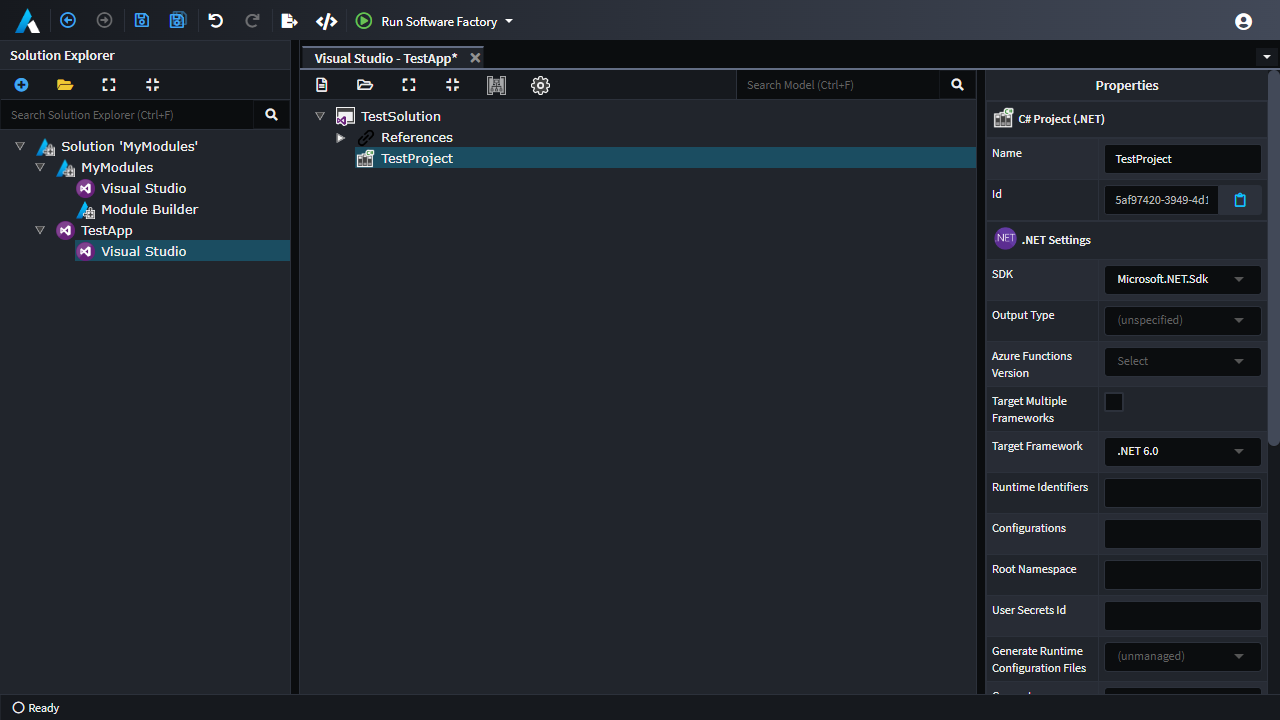
To create this project structure, run the Software Factory Execution. Intent Architect should stage the changes as follows:
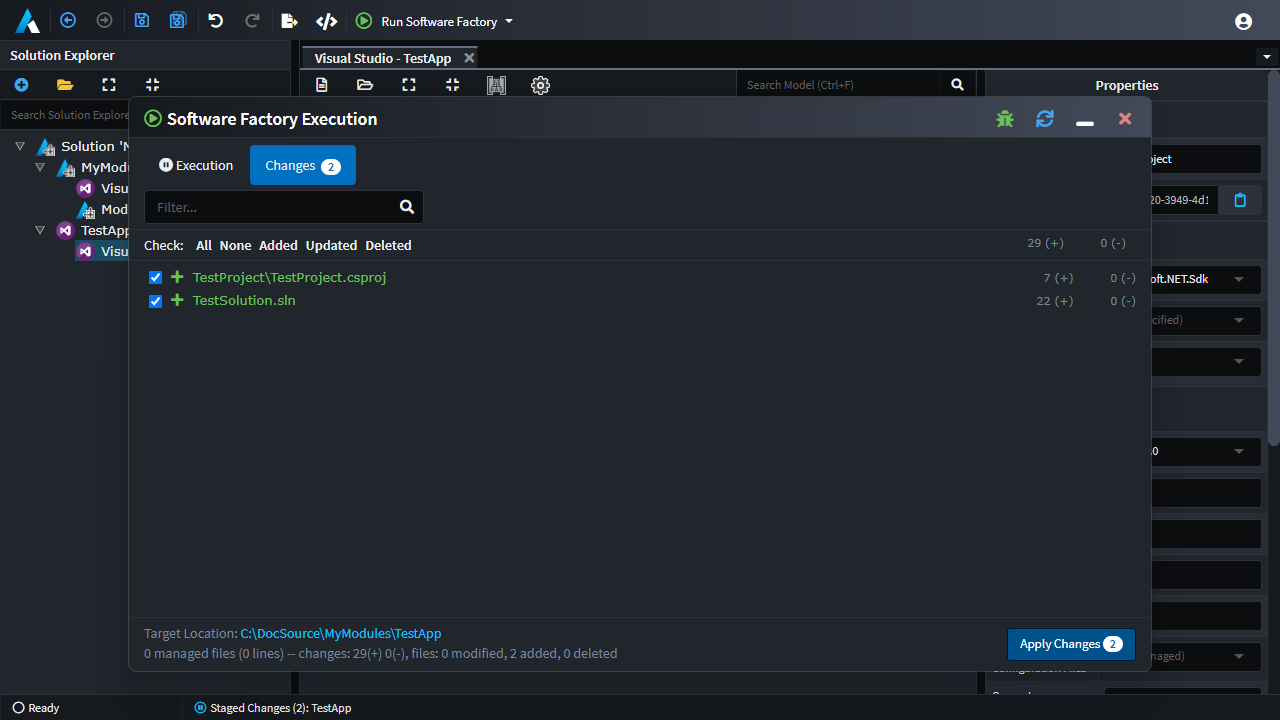
Finally, click
APPLY CHANGESto instruct Intent Architect to create the files in our codebase and minimize the Software Factory Execution.
Install the Module
Next, let's install the Module we created in the previous step. To do this, we first navigate to the Modules tab of our Application. Right click on the TestApp application and select Manage Modules .
Finding and Installing the Module
By default, Intent Architect is configured only with the repository for official Modules hosted at https://intentarchitect.com/. To be able to use our own Module we need to make a new repository which is set to the folder where our MyModules.Entities.1.0.0.imod file was created.
Open
Manage Repositoriesfrom the Profile Menu.Add a new Repository with a unique
Name(e.g. "My Modules") and theAddressvalue being the full location of the folder where our Module was created (e.g.C:\Code\MyModules\Intent.Modules).Reorder the repositories so that this new one is at the top.
Click
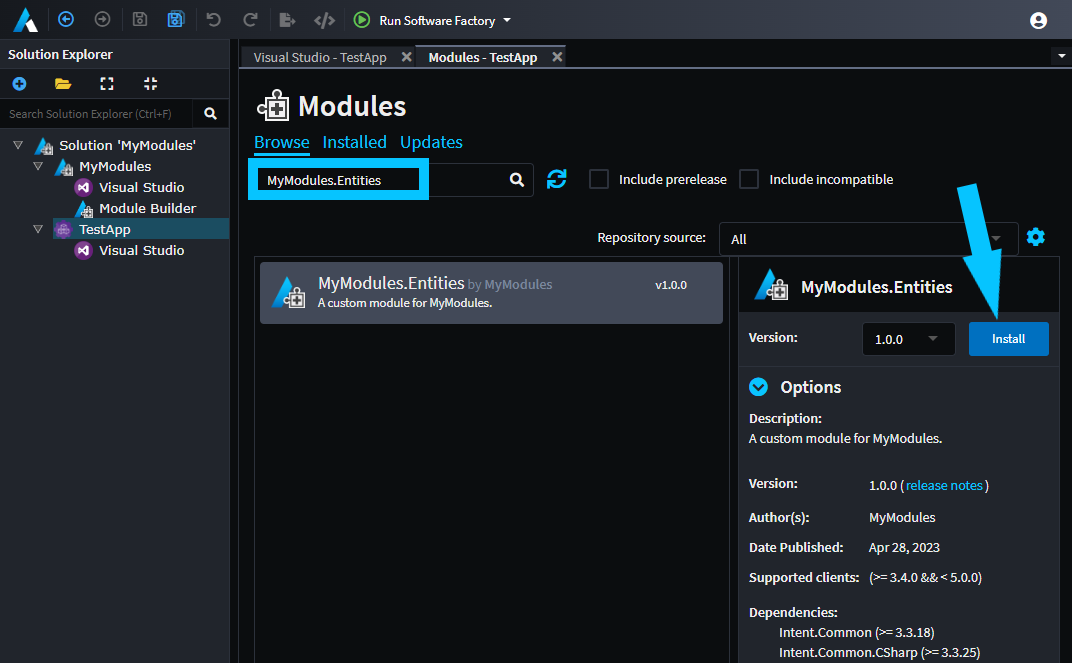
Save.Type in the search field
MyModules.Entitiesto locate your new Module.Tip
You can also go to the Repository dropdown and select your newly created Repository which will list only the Modules you have created.
Install the Module.
Assigning the Template Output
After the installation of the module, notice that the minimized Software Factory is now showing a warning symbol.
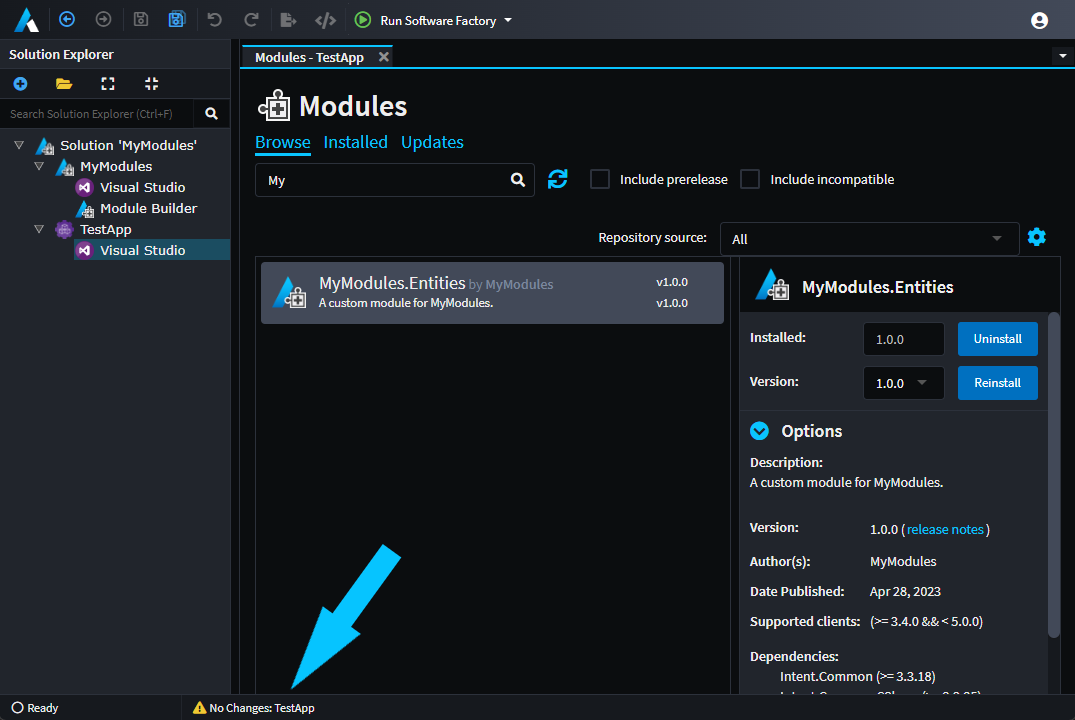
This is due to the background Software Factory Execution process (which you've minimized previously) having detected changes made to your project which triggered a re-run of the Software Factory Execution.
After opening the highlighted status button below, you can drill down into the details to inspect what went wrong.
The logged error lets us know that MyModules.Entities.EntityBase template hasn't yet had its output location set within the Visual Studio Designer, meaning that the Software Factory cannot determine where to place generated output for it.
Minimize the Execution window.
Navigate to the
Visual StudioDesigner.Drag the
MyModules.Entities.EntityBaseTemplate Output into theTestProjectproject.Click on Save.
We've now told Intent Architect that when generating the EntityBase template, the output should be placed in the TestProject project.
Run the Module
We've created a project structure, installed our Module, and set the Output Target to our TestProject project. We are now ready to run our Module.
Notice that the Software Factory automatically executed itself when you saved the
Visual StudioDesigner and when clicking on it you should see the following staged changes: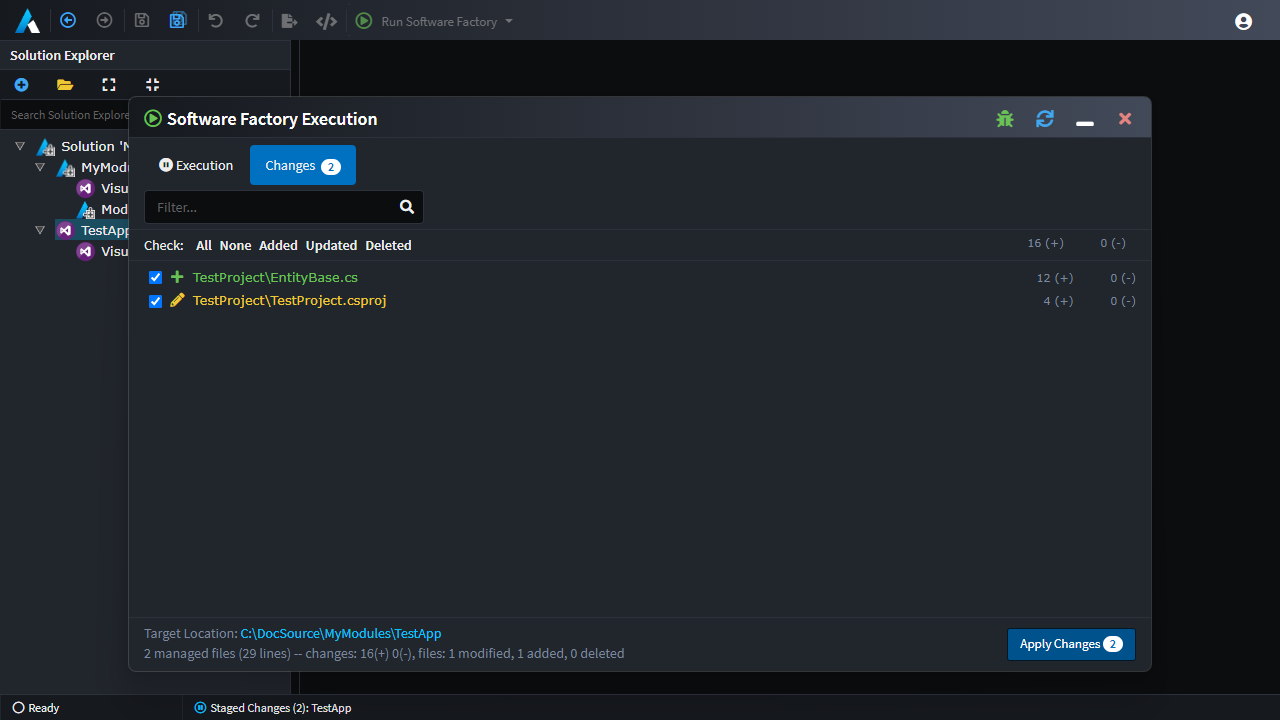
Click the
APPLY CHANGESbutton.Minimize the Software Factory Execution.
Open the codebase to verify that the new
EntityBase.csfile was created in the correct location.
Note
You may have noticed that a NuGet package (Intent.RoslynWeaver.Attributes) was added to the TestProject.csproj file. This package provides non-executing C# attributes which are used to instruct the Code-Management systems in C#. This is not a hard dependency, does not affect runtime execution in any way and can be swapped out or removed if needed.
Looking at the generated file EntityBase.cs, you will see the generated code is as we expected and should look as follows:
using System;
using Intent.RoslynWeaver.Attributes;

[assembly: DefaultIntentManaged(Mode.Fully)]
[assembly: IntentTemplate("MyModules.Entities.EntityBase", Version = "1.0")]

namespace TestProject
{
    public class EntityBase
    {
        public DateTime CreatedDate { get; set; }
        public string CreatedBy { get; set; }
        public DateTime UpdatedDate { get; set; }
        public string UpdatedBy { get; set; }
    }
}
What's Next
Create a template which generates code based on designers
In the next section you will learn how to integrated you the data from your Intent Architect designers (e.g. the Domain Designer or Services Designer) with the templating eco-system. In this tutorial you will produce C# classes based off of entities modelled in the Domain Designer.